How to configure Ingrid
About this article
In this article you will learn how to set up the Ingrid plugin. Centra currently supports two Ingrid plugins - V1 and V2.
Ingrid is a delivery platform that connects your brand, your customers, and shipping carriers. In essence, Ingrid allows you to display delivery methods in your checkout suitable to your customers shipping address, equipping your brand with global shipping alternatives. Once Ingrid is active, it generates a widget on your checkout that your end customers can use.
Differences between Ingrid V1 and V2
See below information about supported features in each version of the Ingrid plugin as well as a summary of each functionality:
Ingrid V1
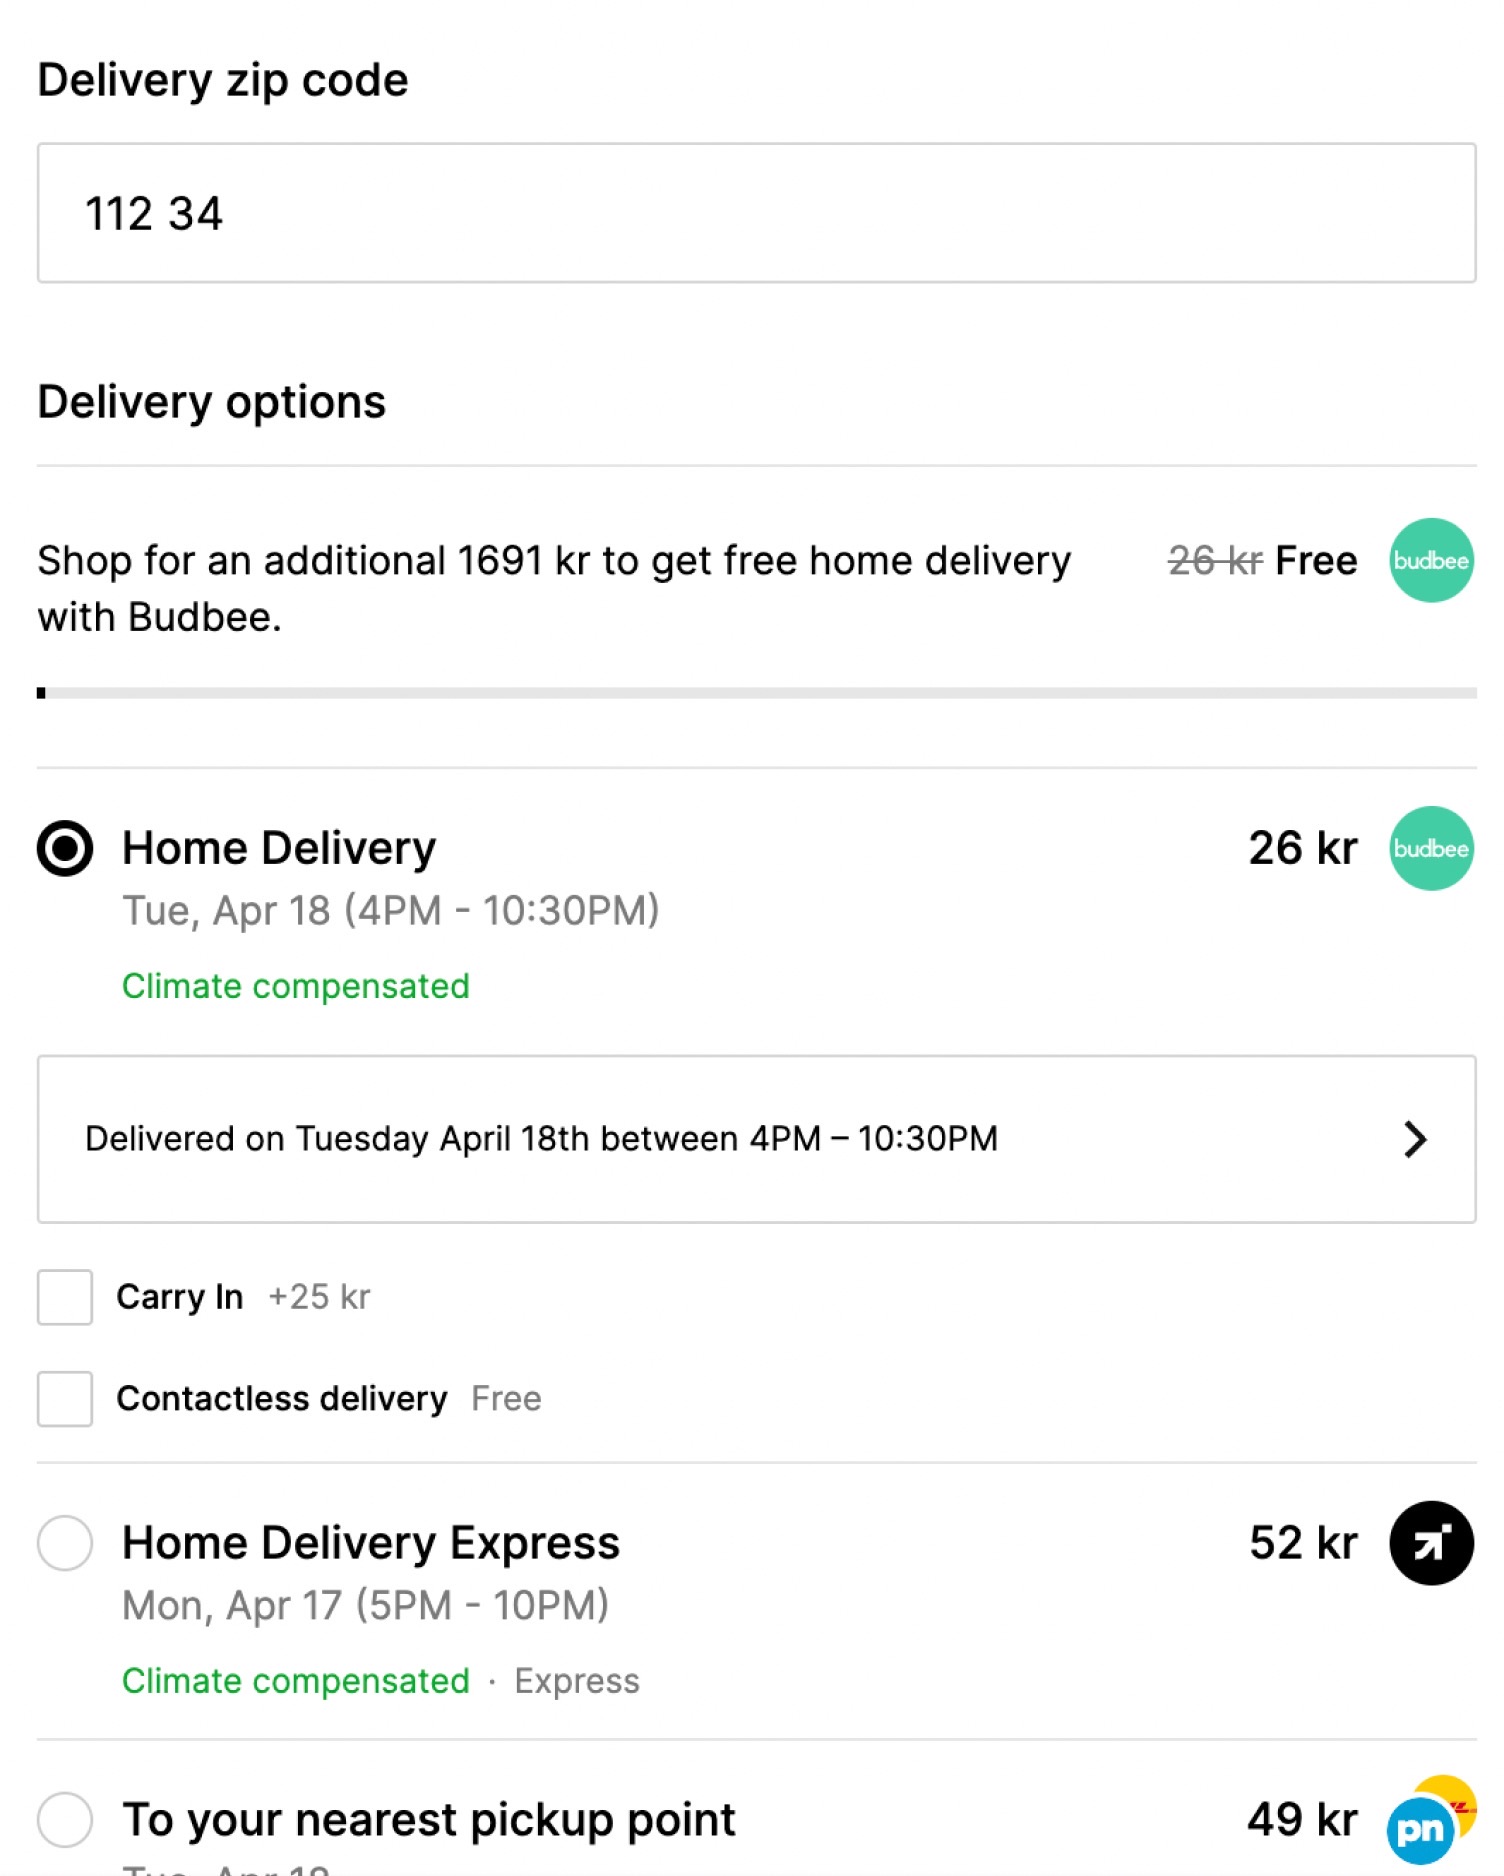
End customers can enter a zip code and Ingrid will showcase delivery options available for that zip code. Ingrid V1 also allows the use of other fields to narrow down delivery options, such as country. It’s possible for the frontend to send an entire shipping address to Ingrid based on which delivery options would be shown. However, the frontend needs to collect that address using a custom address form.
In Ingrid, this feature is referred to as “Search address“.
Available features
- Search address (by postcode, country, or full address provided by the frontend)
- Delivery options widget
Ingrid V2
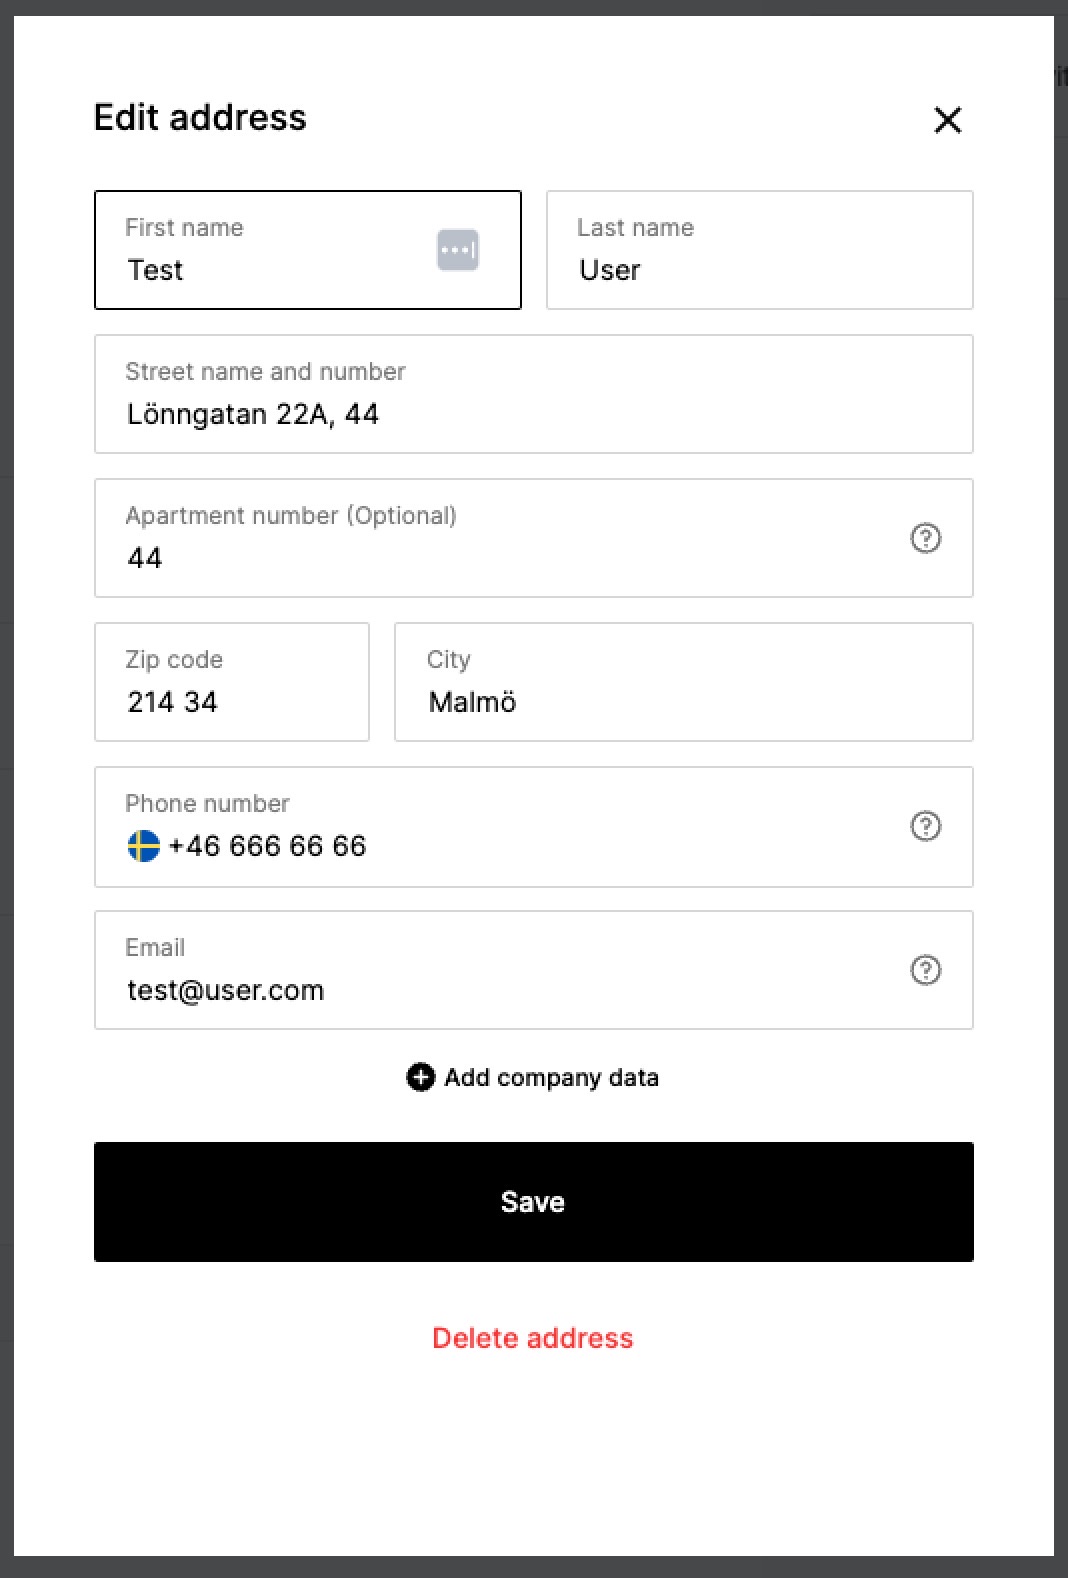
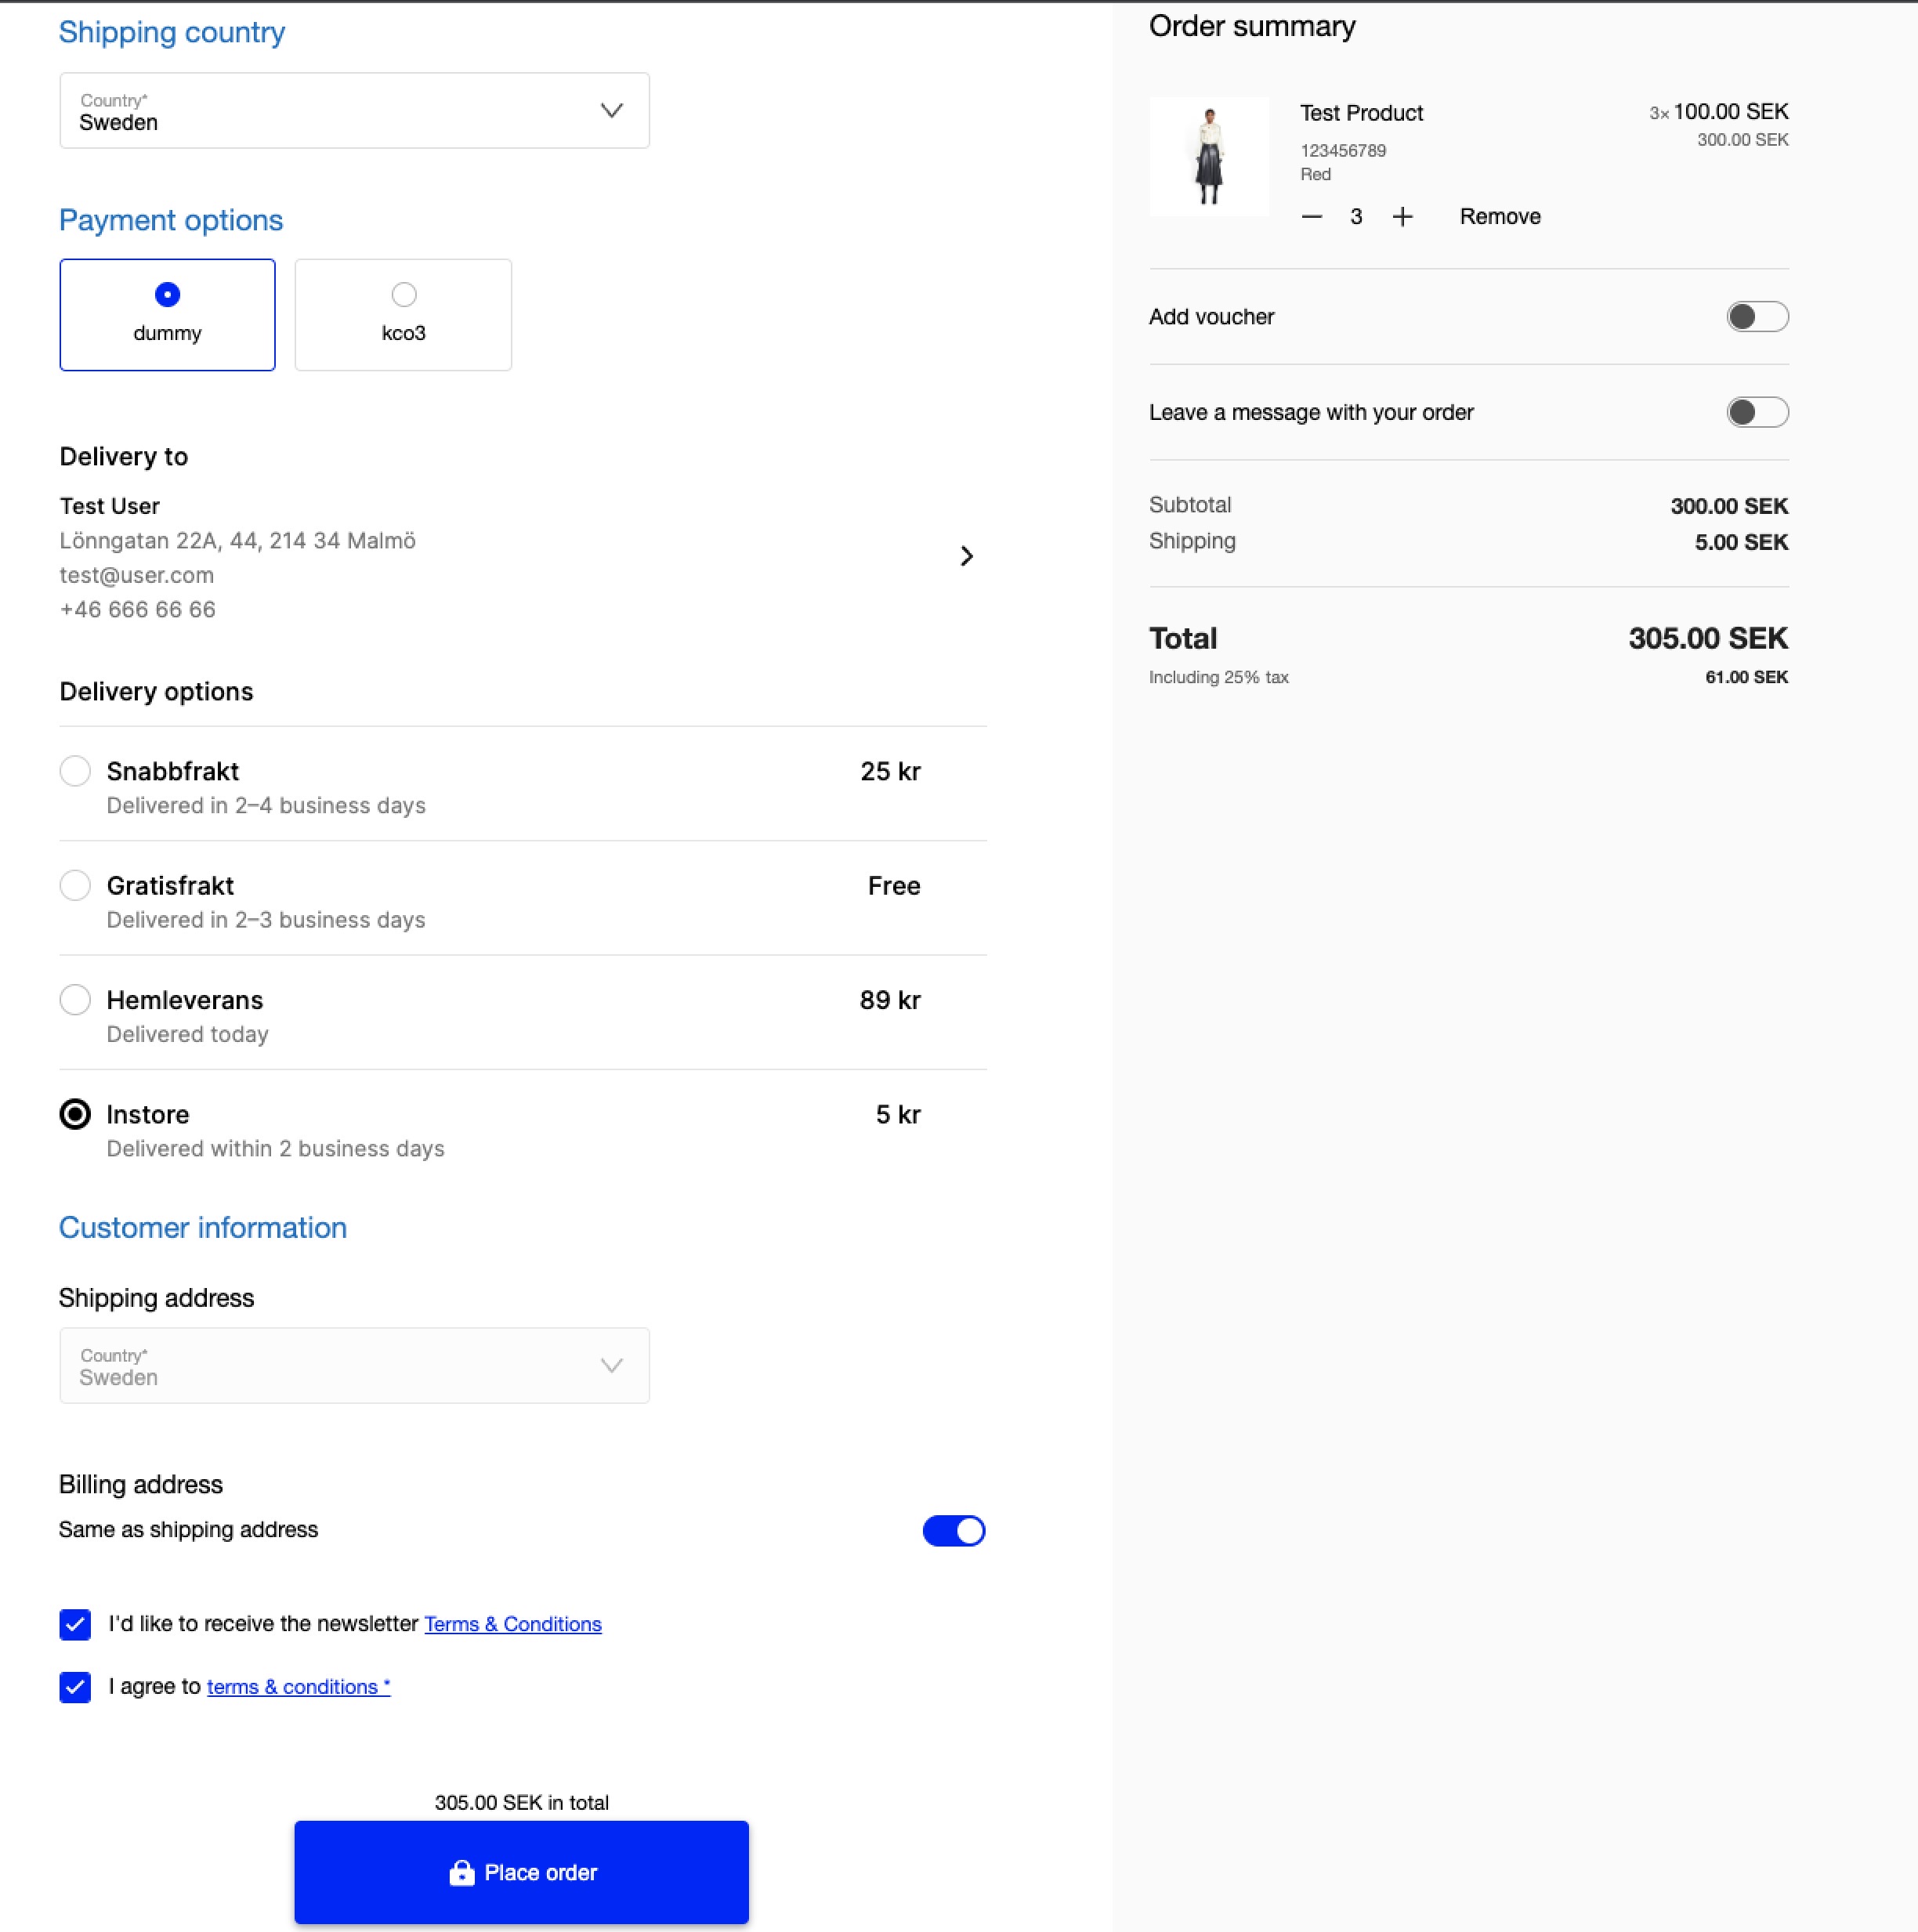
Today you can use Ingrid v2 both with the default "Address form" feature enabled, or you can disable it and work only with a "Delivery widget". Ingrid's delivery widget only returns available shipping options, while address form returns a full address form with additional address validation on Ingrid's end. With address form enabled, end-customers can enter a full shipping address and Ingrid will return all available delivery options for that shipping address. In this case, Ingrid provides the shipping address form as part of the widget that will be shown in your checkout.
End-customers can also enter a full billing address or choose for the billing address to be the same as the shipping address. The billing address form is also part of the Ingrid widget shown in the checkout.
In Ingrid, this feature is referred to as “Address form“.
When the Address Form feature is disabled, Ingrid will only load the “Delivery widget“, which allows you to select available shipping options based on the address you've previously provided.
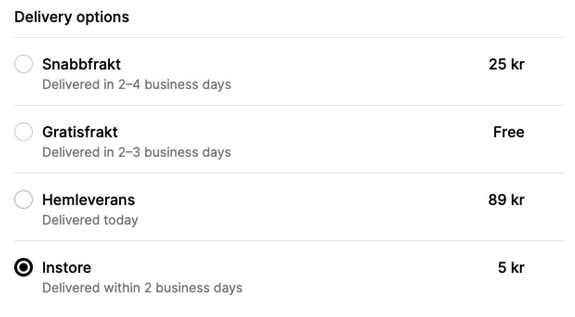
Available features
- Shipping address form
- Billing address form
- Delivery options widget
Adding the Ingrid plugin to Centra
To add the Ingrid plugin to your DTC store, follow the steps below. Please note that there are two versions available: v1 and v2.
- Go to 'System' in the main menu to the left
- Click 'Stores'
- Open the DTC store where you’d like to set up Ingrid
- Scroll down to the 'Plugins' section below the store settings
- Click '+Add plugin method' and locate and select Ingrid V1 or Ingrid V2 depending on the version you wish to install. Note that these are listed under the Shipping method category
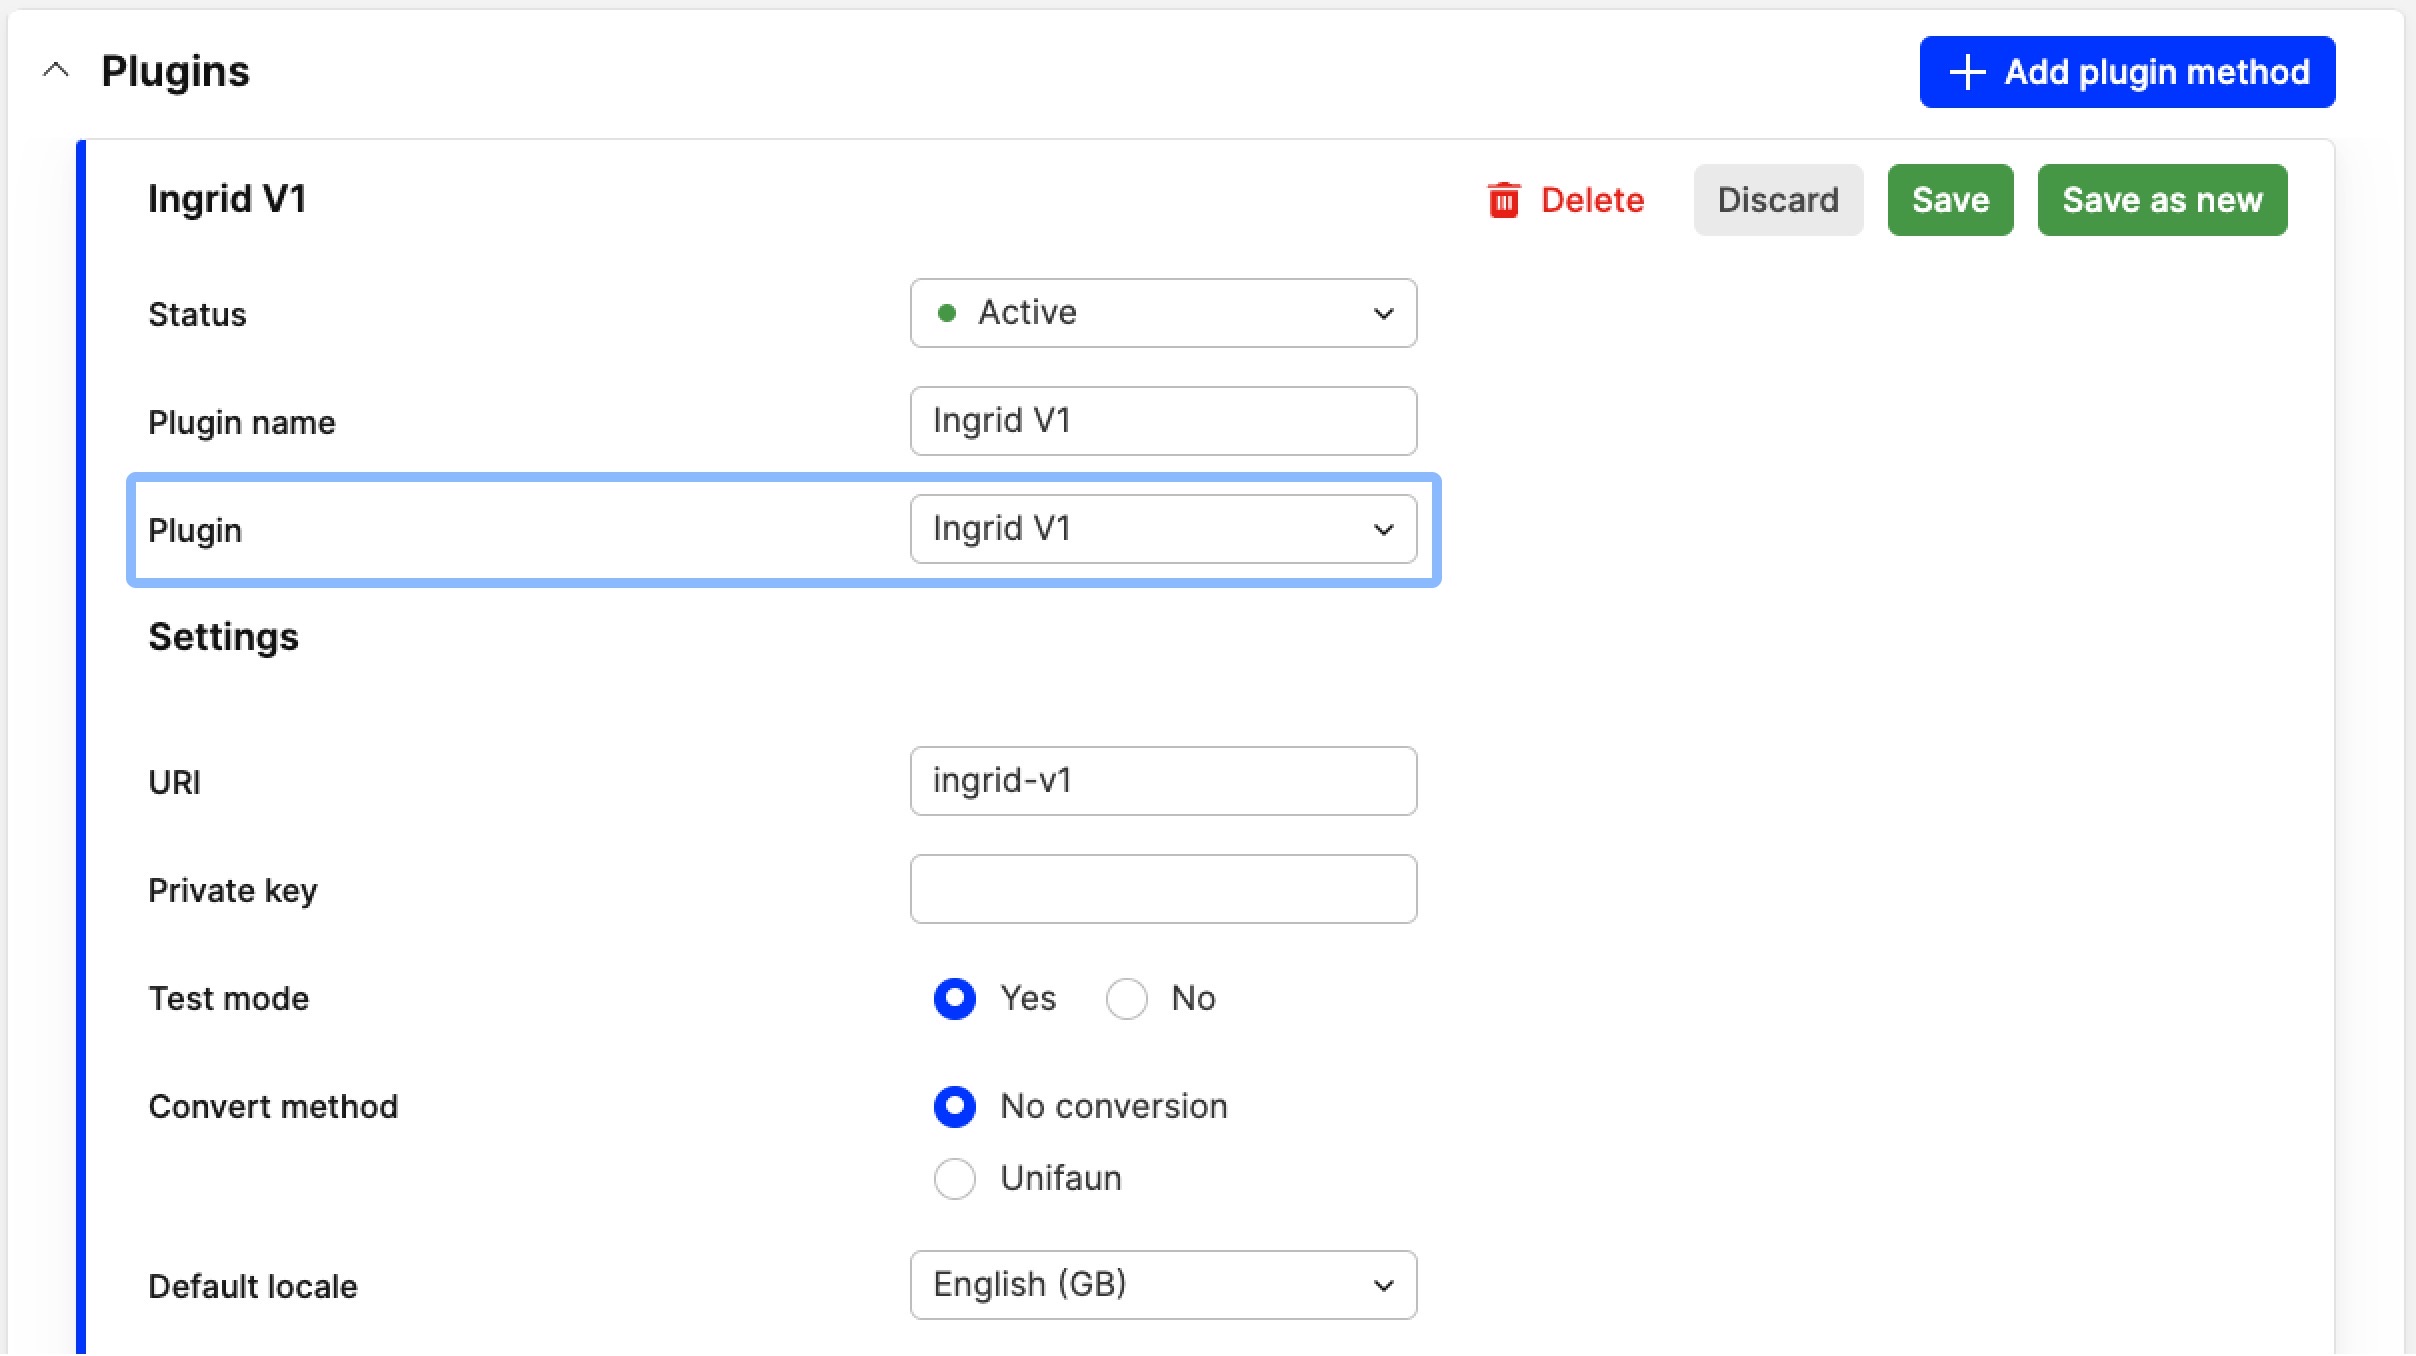
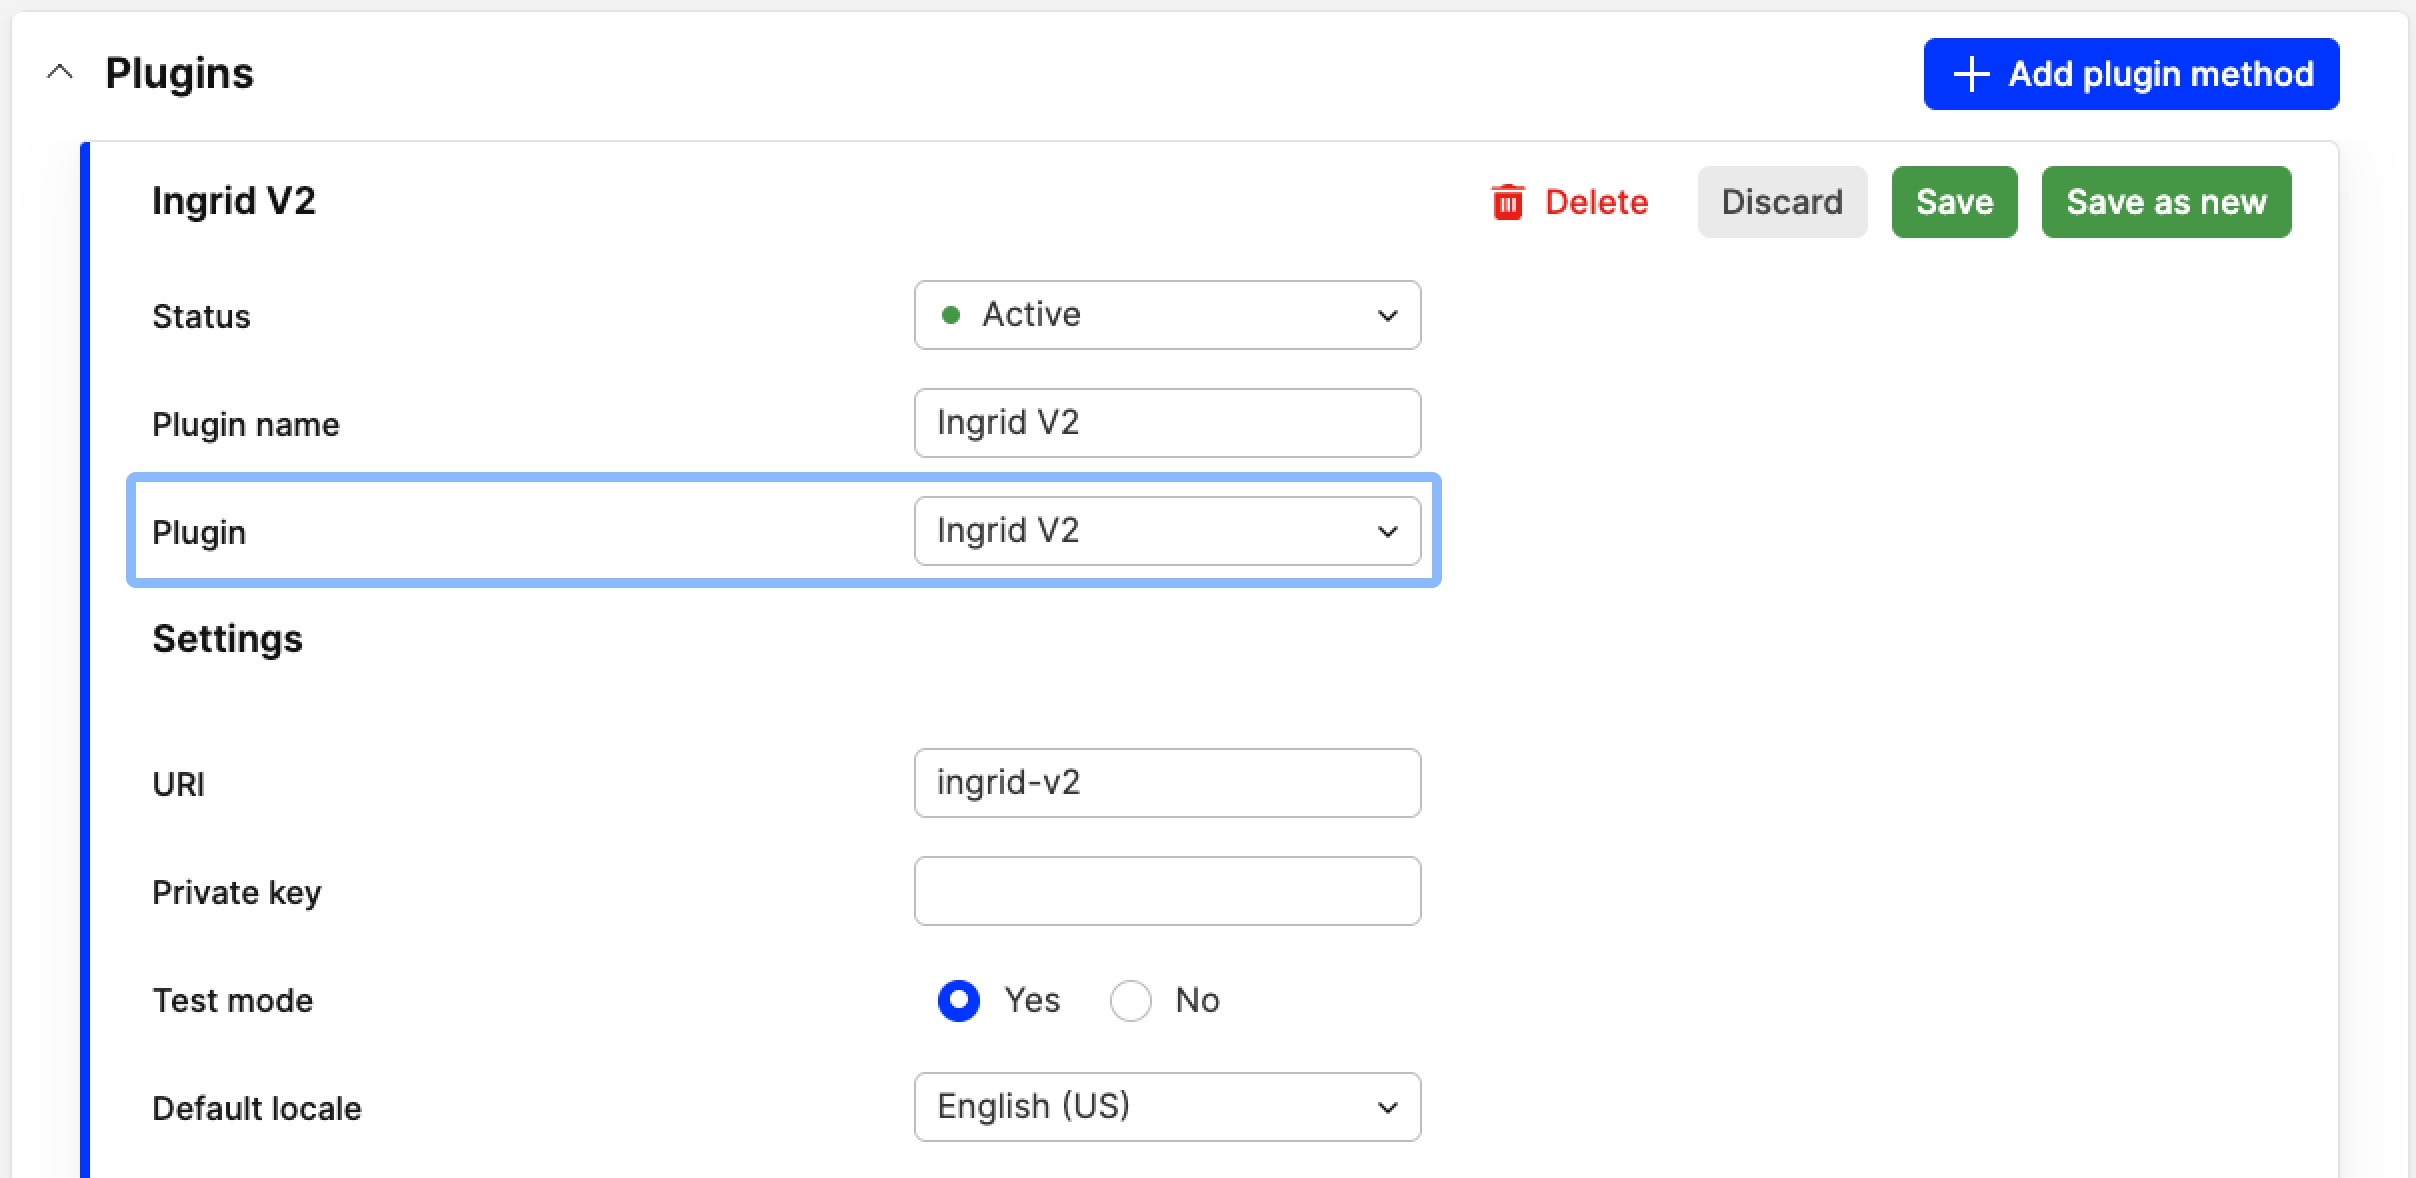
- Review the settings. Please refer to section Plugin settings below for specific information about each setting
- Click 'Save' when done.
Plugin settings
Below you can find a list of all common settings shared between Ingrid V1 and V2. Right after, we have separate sections for version-specific settings:
Ingrid V1 & V2 shared settings
- Status - Make sure the plugin status is activated when you feel satisfied with the setup
- Plugin name - Name your plugin
- Plugin - Choose between Ingrid V1 or Ingrid V2
- URI - This will be automatically generated based on the name you enter in the name field. However, note that you can use a different URI if you wish
- Private key - This field can only be populated once you have received a key from Ingrid. Without this, you are unable to connect with Ingrid
- Test mode - Depending on which stage of setup you are in with this plugin, you can decide whether you want to use this for testing purposes or not. 'Yes' means that all orders end up in an Ingrid test environment, while 'No' means all orders are made toward the production environment
- Default locale - Ingrid is available in many languages, but if you do not have localization active you can make sure that customers get the same language throughout their experience by setting a default language
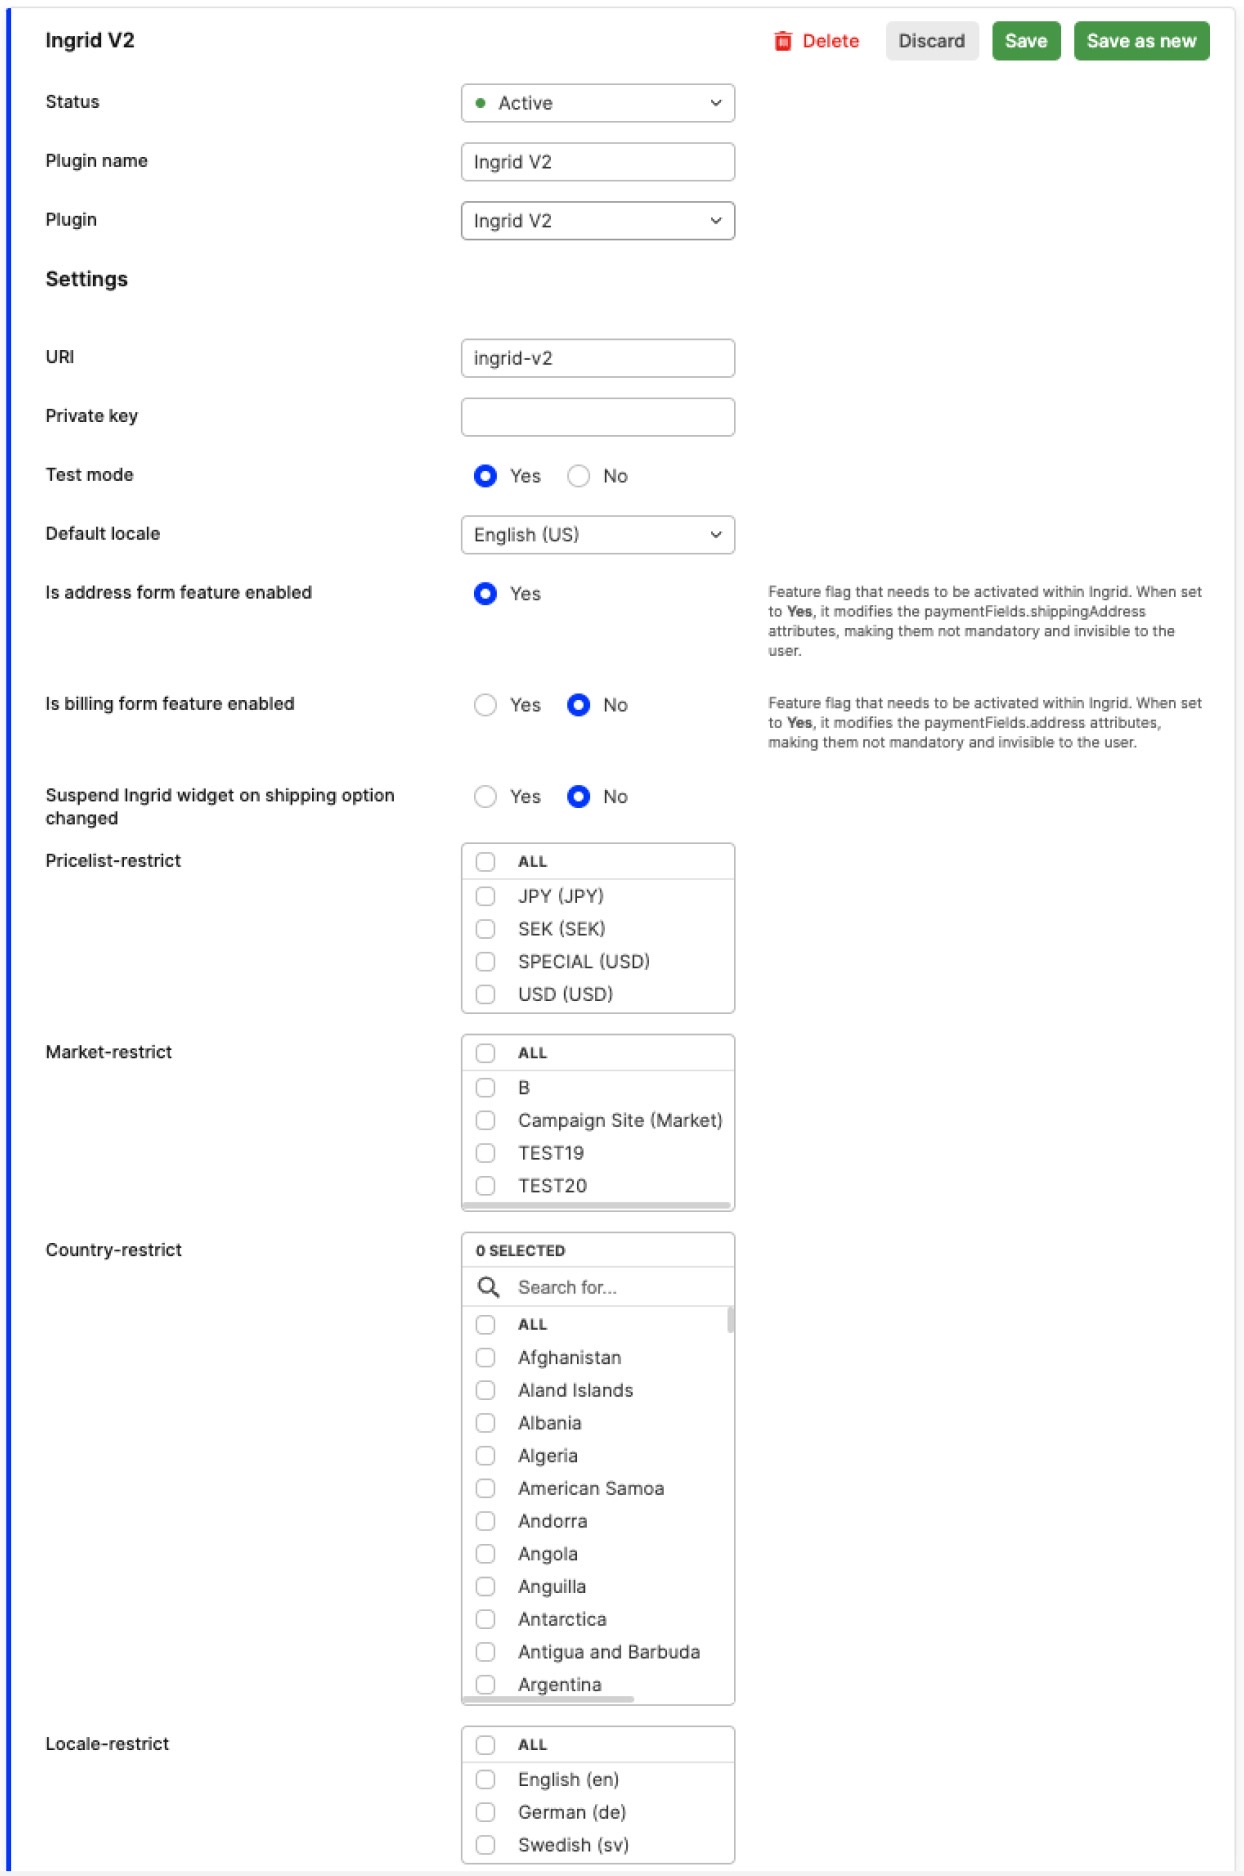
- Suspend Ingrid widget on shipping option changed - If set to 'Yes', Ingrid's widget is put into a "loading state" whenever the shipping option is changed by the user until Centra has recevied the update. It is important that your frontend picks up those changes and resumes the widget when ready
- Pricelist-restrict - You are able to restrict which pricelists have access to the Ingrid widget by ticking the boxes of the respective pricelists. If you don't select anything, it will be available for all
- Market-restrict - You are able to restrict which markets have access to the Ingrid widget by ticking the boxes of the respective markets. If you don't select anything, it will be available for all
- Country-restrict - You can restrict which countries have access to the Ingrid widget by ticking the boxes of the respective countries. If you don't select anything, it will be available for all
- Locale-restirct - You can restrict which locales have access to the widget by ticking the boxes of the respective locales. If you don't select anything, it will be available for all.
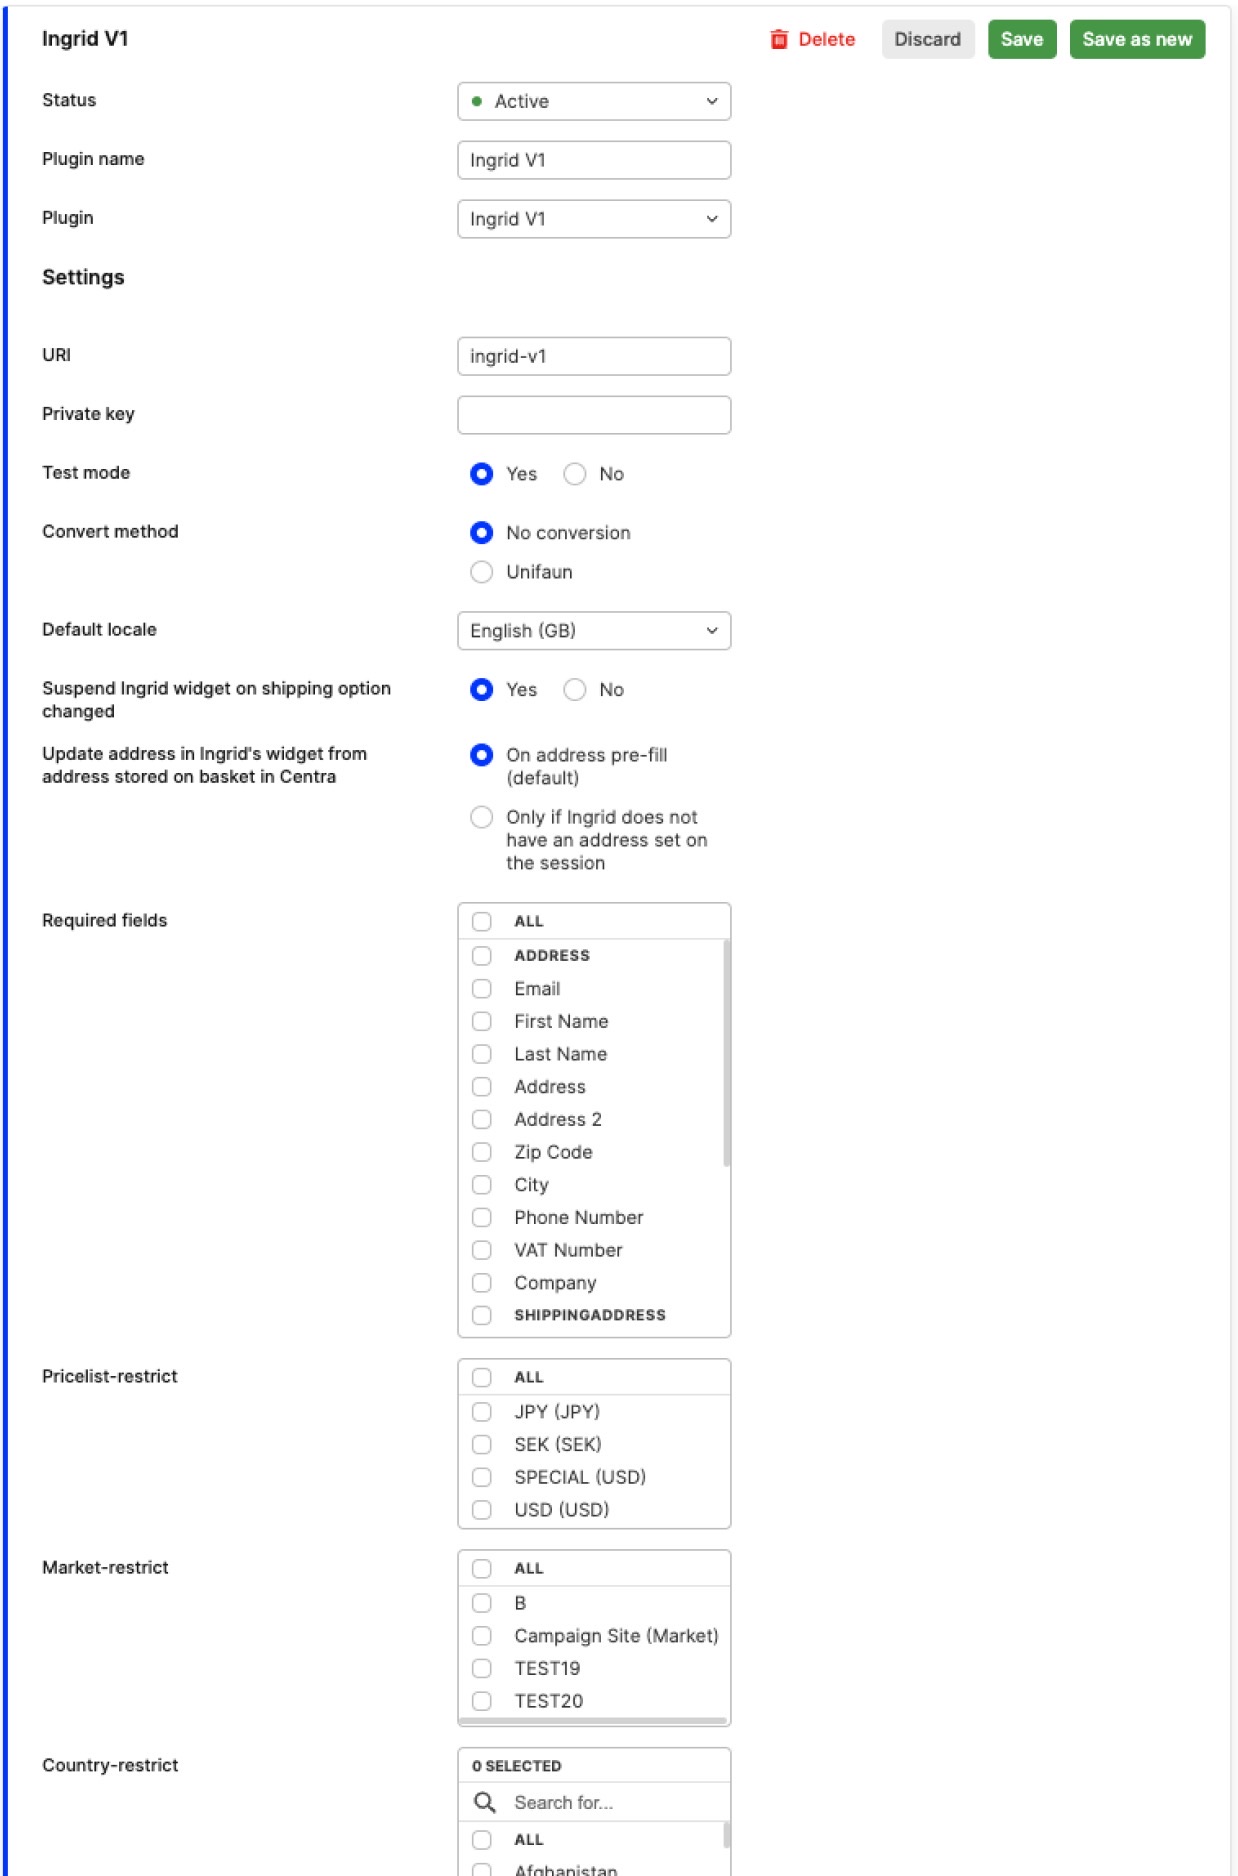
Ingrid V1 settings
- Convert method - This allows Ingrid and Centra to convert the shipping methods defined in your setup to Unifaun/nShift methods for specific warehouse integrations. The default is 'No conversion'
- Update address in Ingrid's widget from address stored on basket in Centra: Centra always tries to populate the Ingrid widget with the selection address, if this has been sent by Ingrid. However, other address updates will depend on this setting:
- 'On address prefill (default)' the address the widget uses to present the shipping options is updated from Centra on the PUT /payment-fields endpoint
- 'Only if Ingrid does not have an address for the session' - prevents the PUT /payment-fields endpoint from updating the address in the Ingrid session
- Required fields - Define which values are required by the customer to be entered in the widget. Tick the boxes to select the fields you want to have as mandatory.
Ingrid V2 settings
-
Is address form feature enabled - This feature is enabled by default - set to 'Yes'. It signifies your confirmation that the address feature is activated for your Ingrid merchant account. Its function is to present an address form in the Ingrid widget where customers can provide their address and information required for delivery processing purposes. Updates of the address information are sent to Centra using the Centra CheckoutScript, which handles client-side events.
Please contact Ingrid support to also enable this setting on Ingrid’s side. -
Is billing form feature enabled - This is set to 'No' by default. If set to 'Yes', it signifies your confirmation that the billing form feature is activated in Centra. Its function is to present a ‘Billing to’ section and a 'Same as delivery' checkbox in the Ingrid widget. If the checkbox is selected, it indicates that the billing address is the same as the delivery address. If the checkbox is unmarked, a separate billing form is presented for customers to provide specific billing information. Updates to the address information are sent to Centra using the Centra CheckoutScript, which handles client-side events.
Before enabling the billing form feature setting in the plugin, please contact Ingrid support to enable it on Ingrid's side. -
If both above configs are disabled (
Is address form feature enabled: NoandIs billing form feature enabled: No), Ingrid will only load the Delivery widget, showing the shipping options available for the previously submitted shipping address. Centra doesn't offer any address validation in this case
How to implement Ingrid in your Checkout
To understand what happens "behind the scenes", about problems that can occur and much more, your front-end partner can read more about how to implement Ingrid in the following articles:
- How to implement Ingrid in your Checkout (Ingrid V1 setup)
- How to implement Ingrid v2 in your Checkout
How to get free shipping vouchers to work with Ingrid
If you want to setup a free shipping voucher in Centra and make it work when using Ingrid, you need to set up a "free_shipping" tag in Ingrid for each carrier. Here you can read more about how to do so in Ingrid. This works the same in both Ingrid versions.
How is Ingrid data exposed to 3PLs
If a client uses Ingrid to decide the shipping method, they might want to send this data to their 3PL. We have a standardized format of exposing the data in the SOAP API, Order API and Integration (GQL) API.
Fields that are exposed are those saved on the Order as attributes. These are the keys that the 3PL see:
| Parameter | Ingrid V1/Ingrid V2 | Information |
|---|---|---|
| Ingrid ID | V1: shipwallet_idV2: ingrid_v2_id |
Ingrid's unique identifier. 32 characters in size Example: "Abcdef1234567890abcdef1234567890" Generally doesn't hold any value for the 3PL, but good for back tracing |
| Ingrid Service Method | V1: shipwallet_methodV2: ingrid_v2_method |
Name of the chosen shipping method. Maximum 10 characters Example: Ingrid's ID can be "pnl-mpc" (Postnord Mypack). We also support converting this into Unifaun/nShift codes, if that's the system the warehouse utilizes for booking the shipments. For pnl-mpc the Unifaun/nShift code would be P19 |
| Ingrid Converted Method ID | V1: shipwallet_converted_method_idV2: ingrid_v2_converted_method_id |
Identifier of chosen carrier. If the external method identifier is defined on the carrier, its value is passed in this field. Otherwise, the shipping method from the carrier is entered |
| Ingrid Pickup | V1: shipwallet_pickupV2: ingrid_v2_pickup |
If the user has chosen a Service point delivery, this is used as the carrier identifier of that service point. This might be empty, but if not, it’s crucial to get it right, so the customer gets the goods to the right Service Point Example: "12345" |
| Ingrid Door Code | V1: shipwallet_doorcodeV2: ingrid_v2_doorcode |
Door code, if applicable. Maximum 10 characters Example: "1234" |
| Ingrid Delivery Time | V1: shipwallet_deliverytimeV2: ingrid_v2_deliverytime |
When it should be delivered Example: "YYYY-MM-DD" |
| Ingrid Courier Instructions | v1: shipwallet_courier_instructionsv2: ingrid_v2_courier_instructions |
Generic instructions for the courier. Maximum 250 characters Example: “Please leave at the doorstep.” |
| Ingrid TOS ID | V1: shipwallet_tos_idV2: ingrid_v2_tos_id |
Ingrid identifier of order created based on completed session |
| Ingrid Cart Attributes | V1: shipwallet_cart_attribute_dataV2: ingrid_v2_cart_attribute_data |
Cart level attributes are specific to the cart or to the full content of the cart. Ingrid can set different delivery scenarios based on such attributes Example: “PRIO”, “AB-testID” |
| Ingrid Raw Session Response | V1: ingrid_raw_session_responseV2: ingrid_v2_raw_session_response |
Completed session object converted to string |
| Ingrid Reference ID | V1: shipwallet_reference_idV2: ingrid_v2_reference_id |
Carrier-specific ID of the service point location returned by the carrier |
| Ingrid Delivery Type | V1: ingrid_delivery_typeV2: ingrid_v2_delivery_type |
Type of delivery (pickup, instore, mailbox, delivery) |