Creating brands
About this article
Learn how to create and use Brands in Centra. Brands are great to use when products from different brands are sold from one Centra instance. Some example use cases include: My Brand, My Brand x Collaboration with other brand, My Brand x Collaboration with a designer, That other Brand I sell.
How to create a new Brand
- Under the 'More' tab in the main menu at the left, go to 'Brands' and click '+Create Brand'
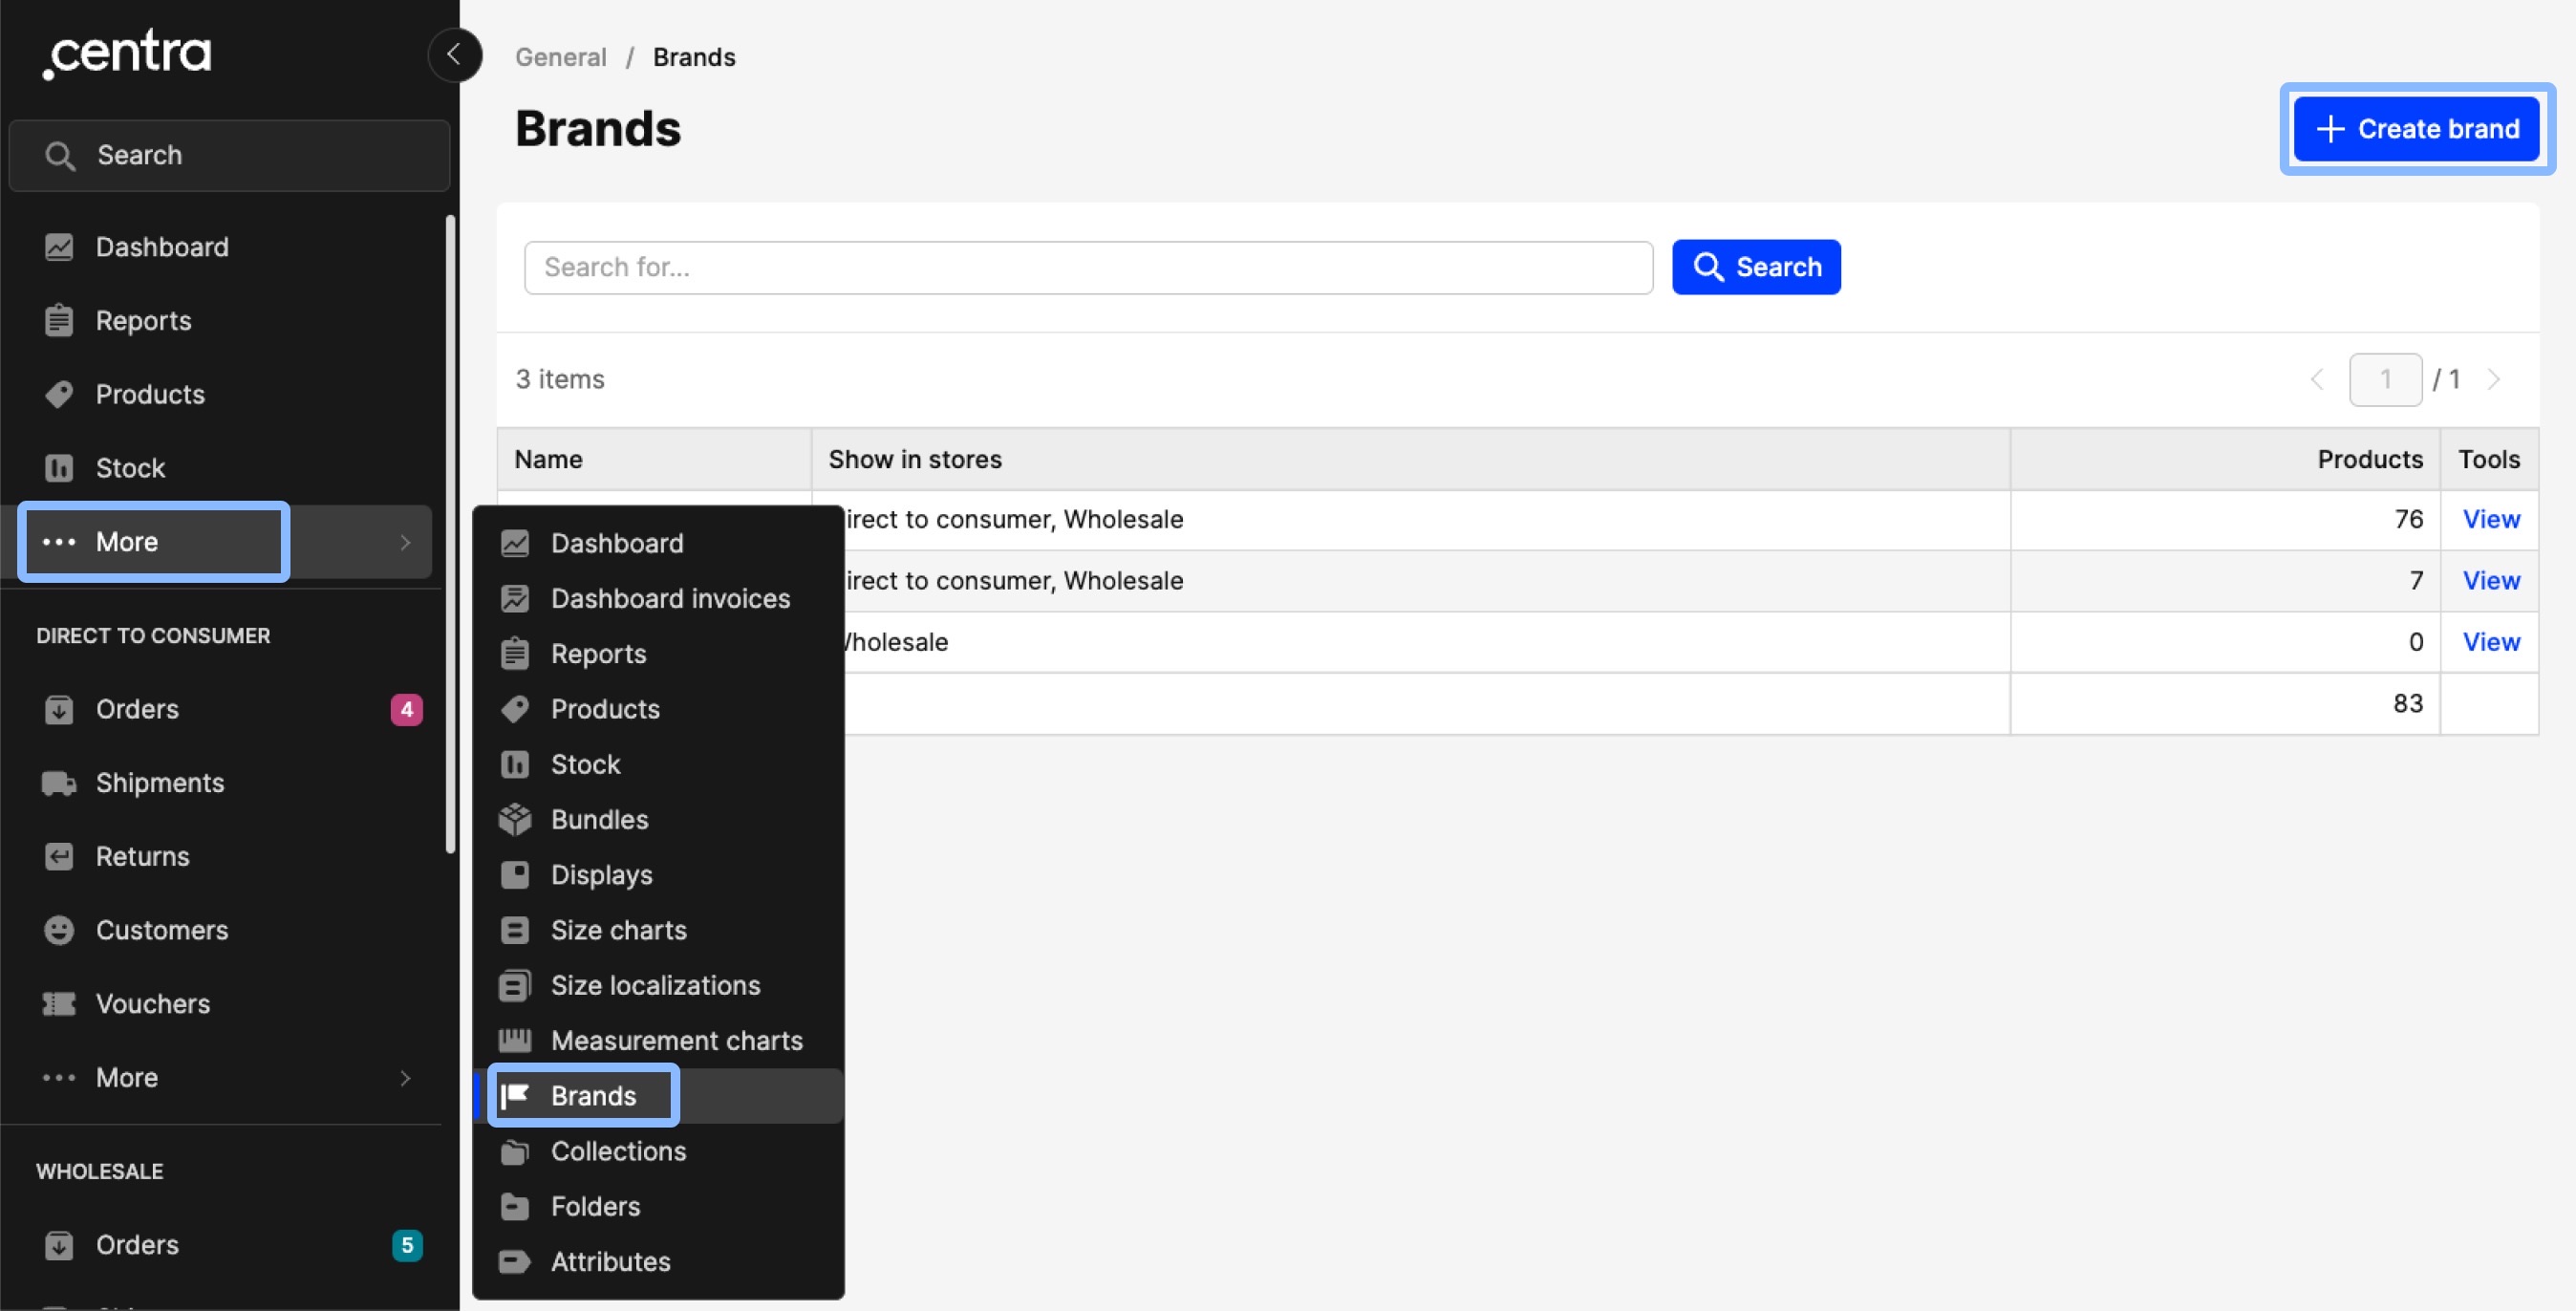
- You will be redirected to this view:
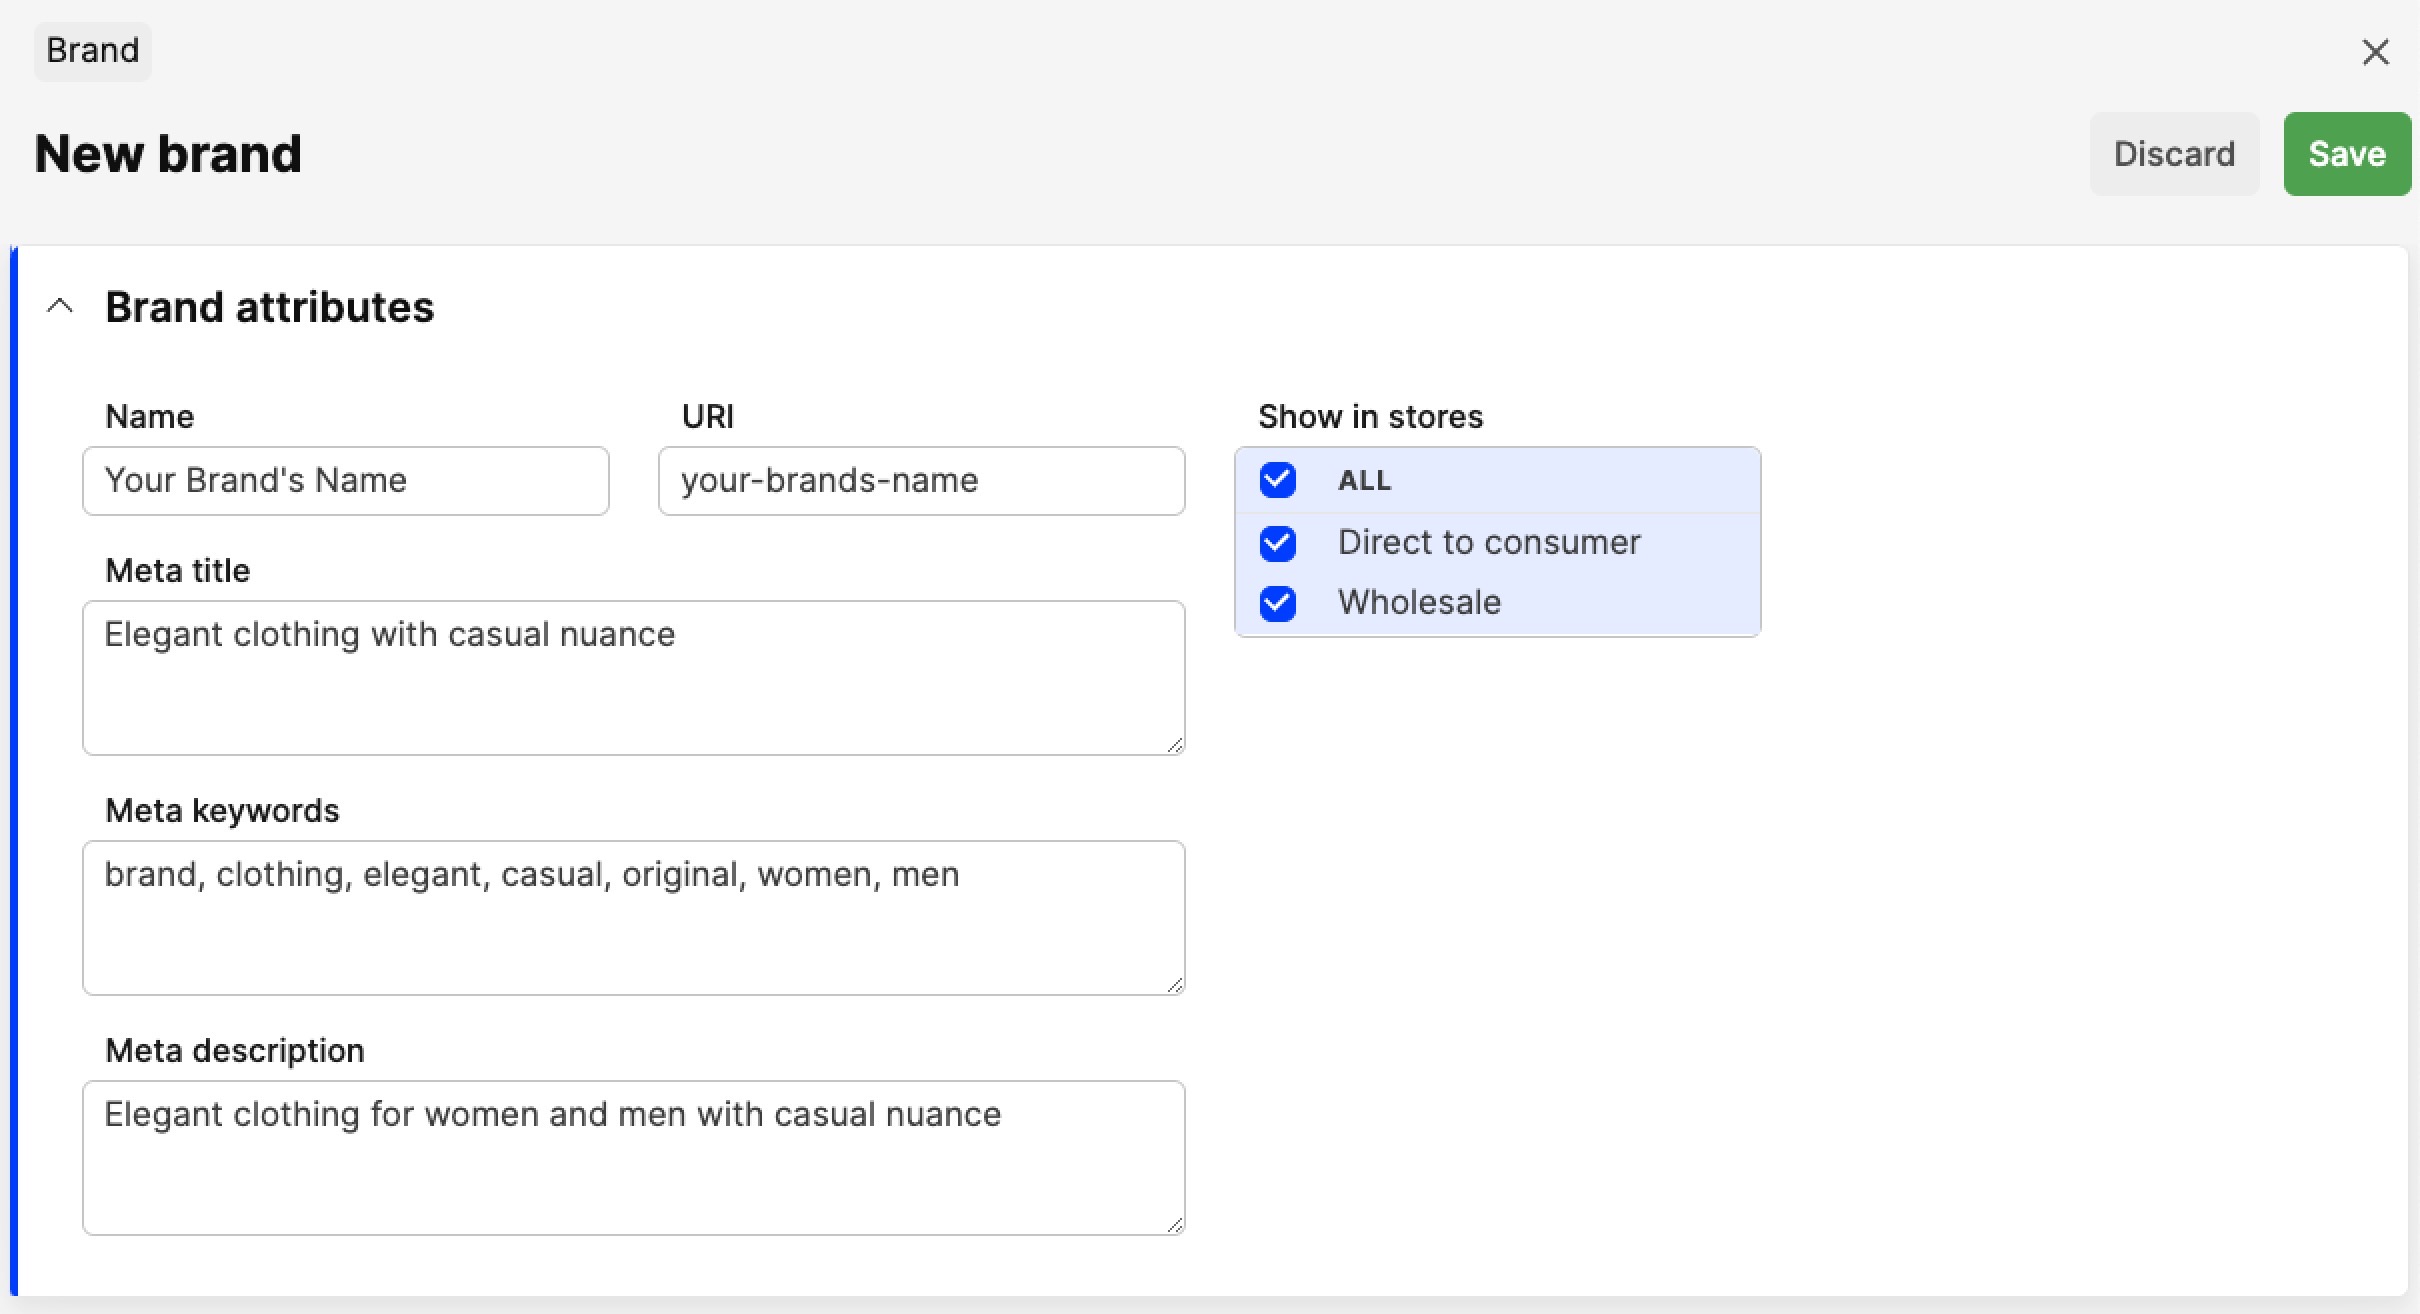
- Enter the following information:
- Brand name - Here you input the name of your Brand
- URI - The URI is the address where the Brand can be found directly by typing, for example, yourstore.com/your-brands-name in the browser address field
- Meta title, Meta keywords and Meta description Click here to read more about metadata
- Show in stores - Choose the store that the Brand should be displayed in. This is a very important setting that allows your products to be shown on the front end of the selected stores
- Click 'Save' in the top-right corner
- Once the new Brand is created, a new section appears called 'Brand products':
 This Brand products section is empty at first. Read more in the following section to understand how to add products to a Brand.
How to add products to a Brand
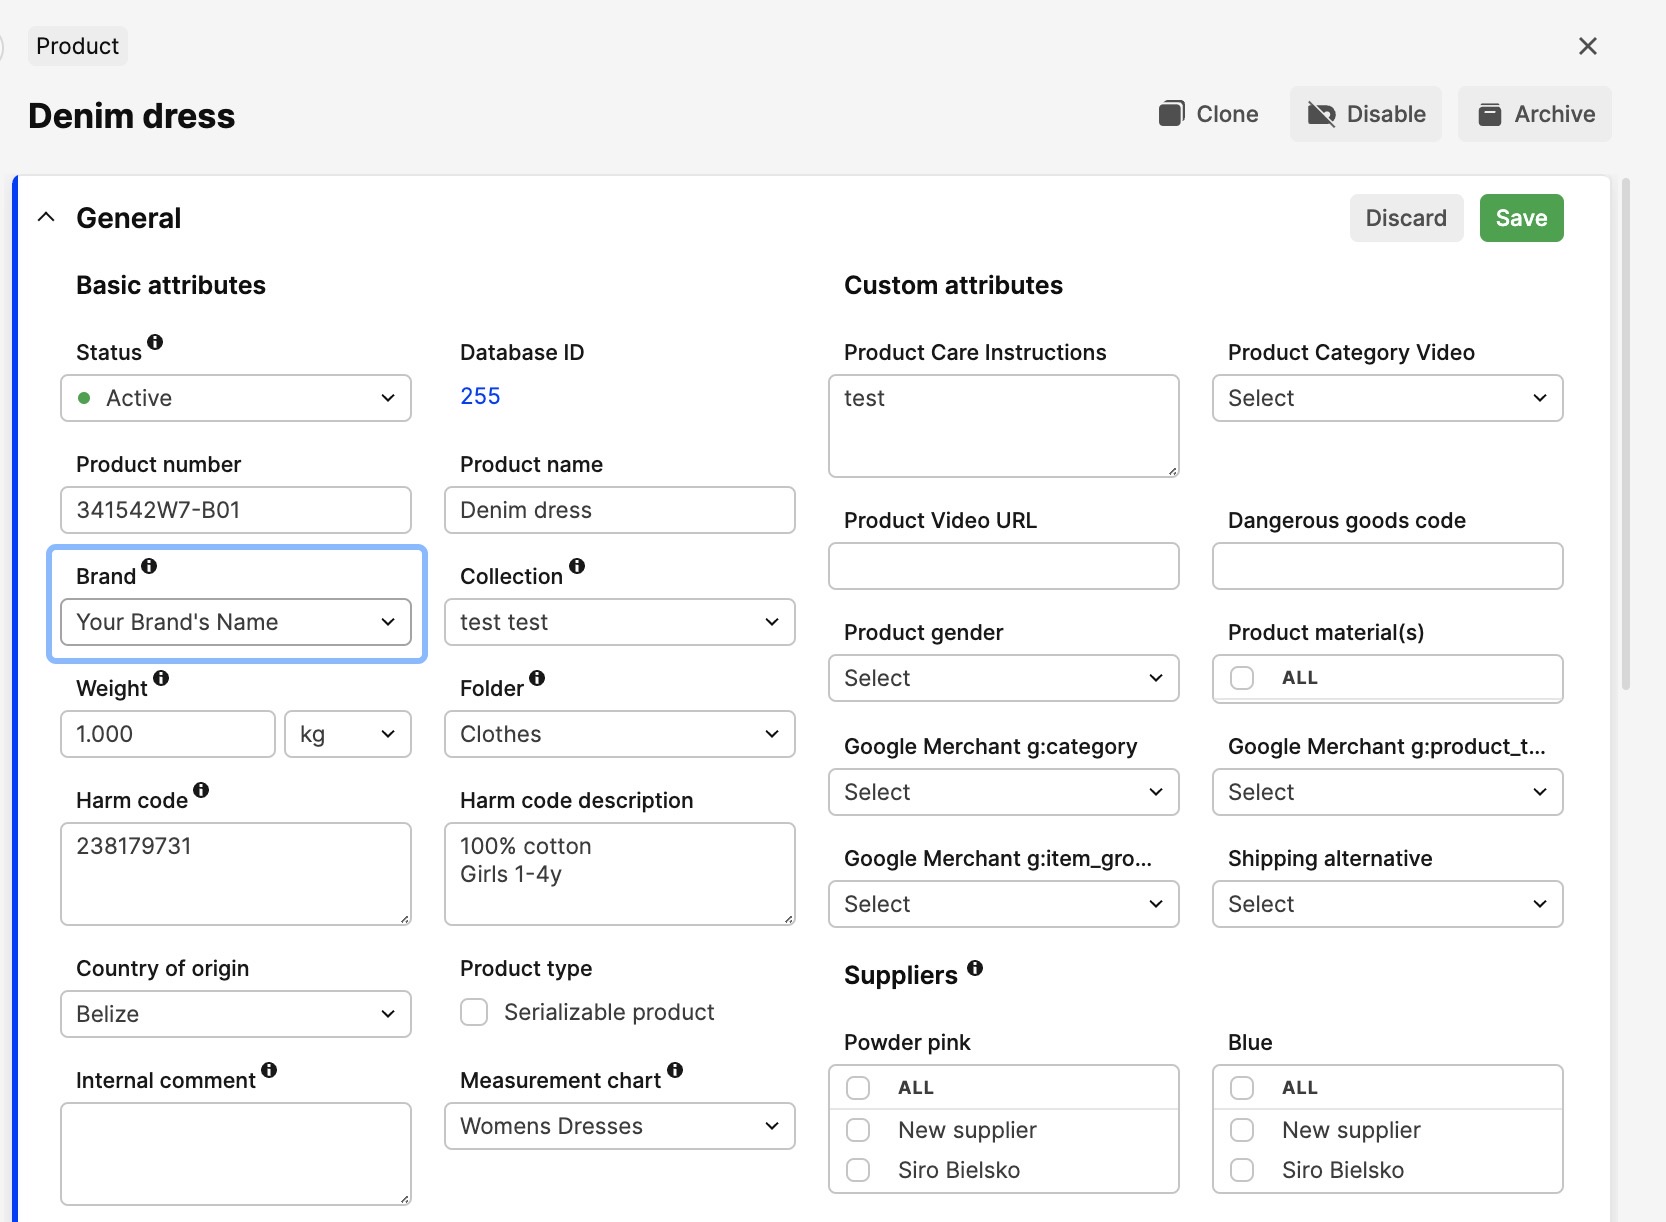
There are a few ways to select a specific Brand on a Product. You can do it on Product level by changing the Brand in the Basic attributes section. This is an individual change, however, so if you want to add or change the Brand of multiple products, you can do that either by using the batch actions on the Products page, or through a Product import. These actions are described below in more detail:
Product level
- In the main menu, click on 'Products' and then select a Product
- Click 'Edit', and in the Brand drop-down menu, select the brand for this Product:
- Click 'Save'.
Product batch actions
- Go to the Products page by clicking 'Products'
- On the left side of the Products listing, select the Products of your choice by ticking their respective tick boxes. In the Action drop-down, select 'Change general attributes' and click 'Apply'
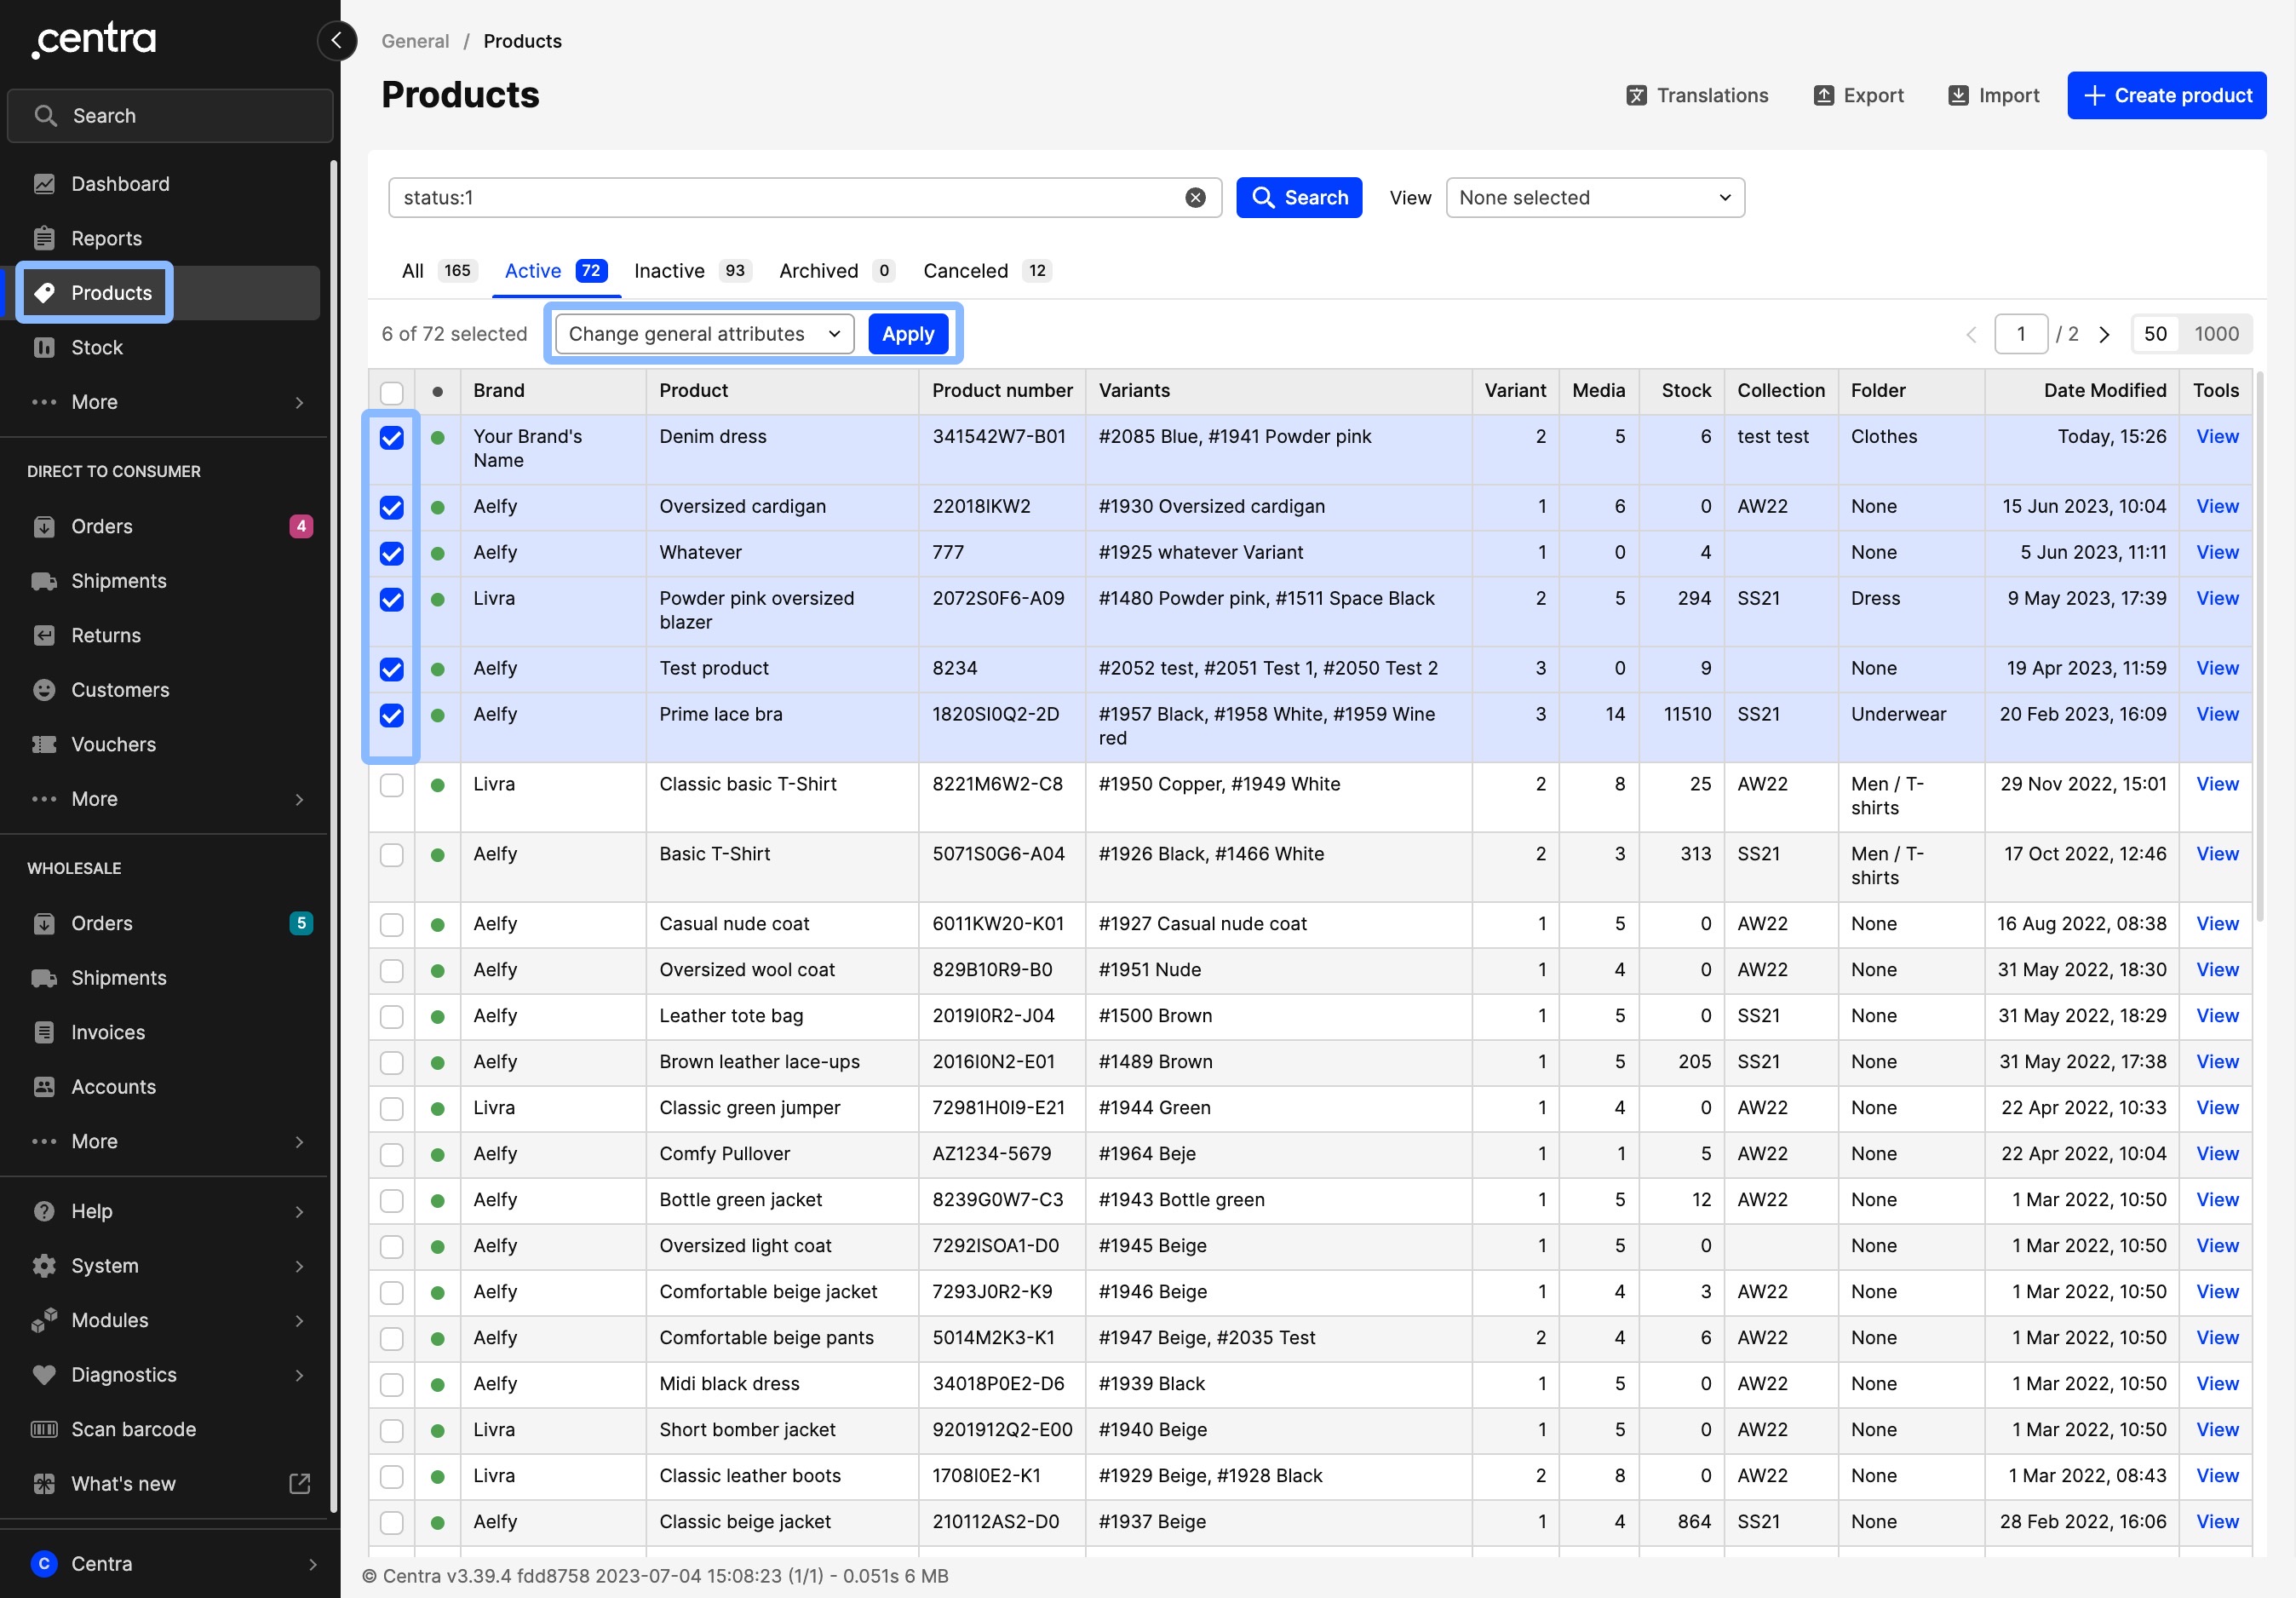
- In the pop-up window, tick the 'Brand' option, which will make the drop-down menu available, and select the Brand of your choice
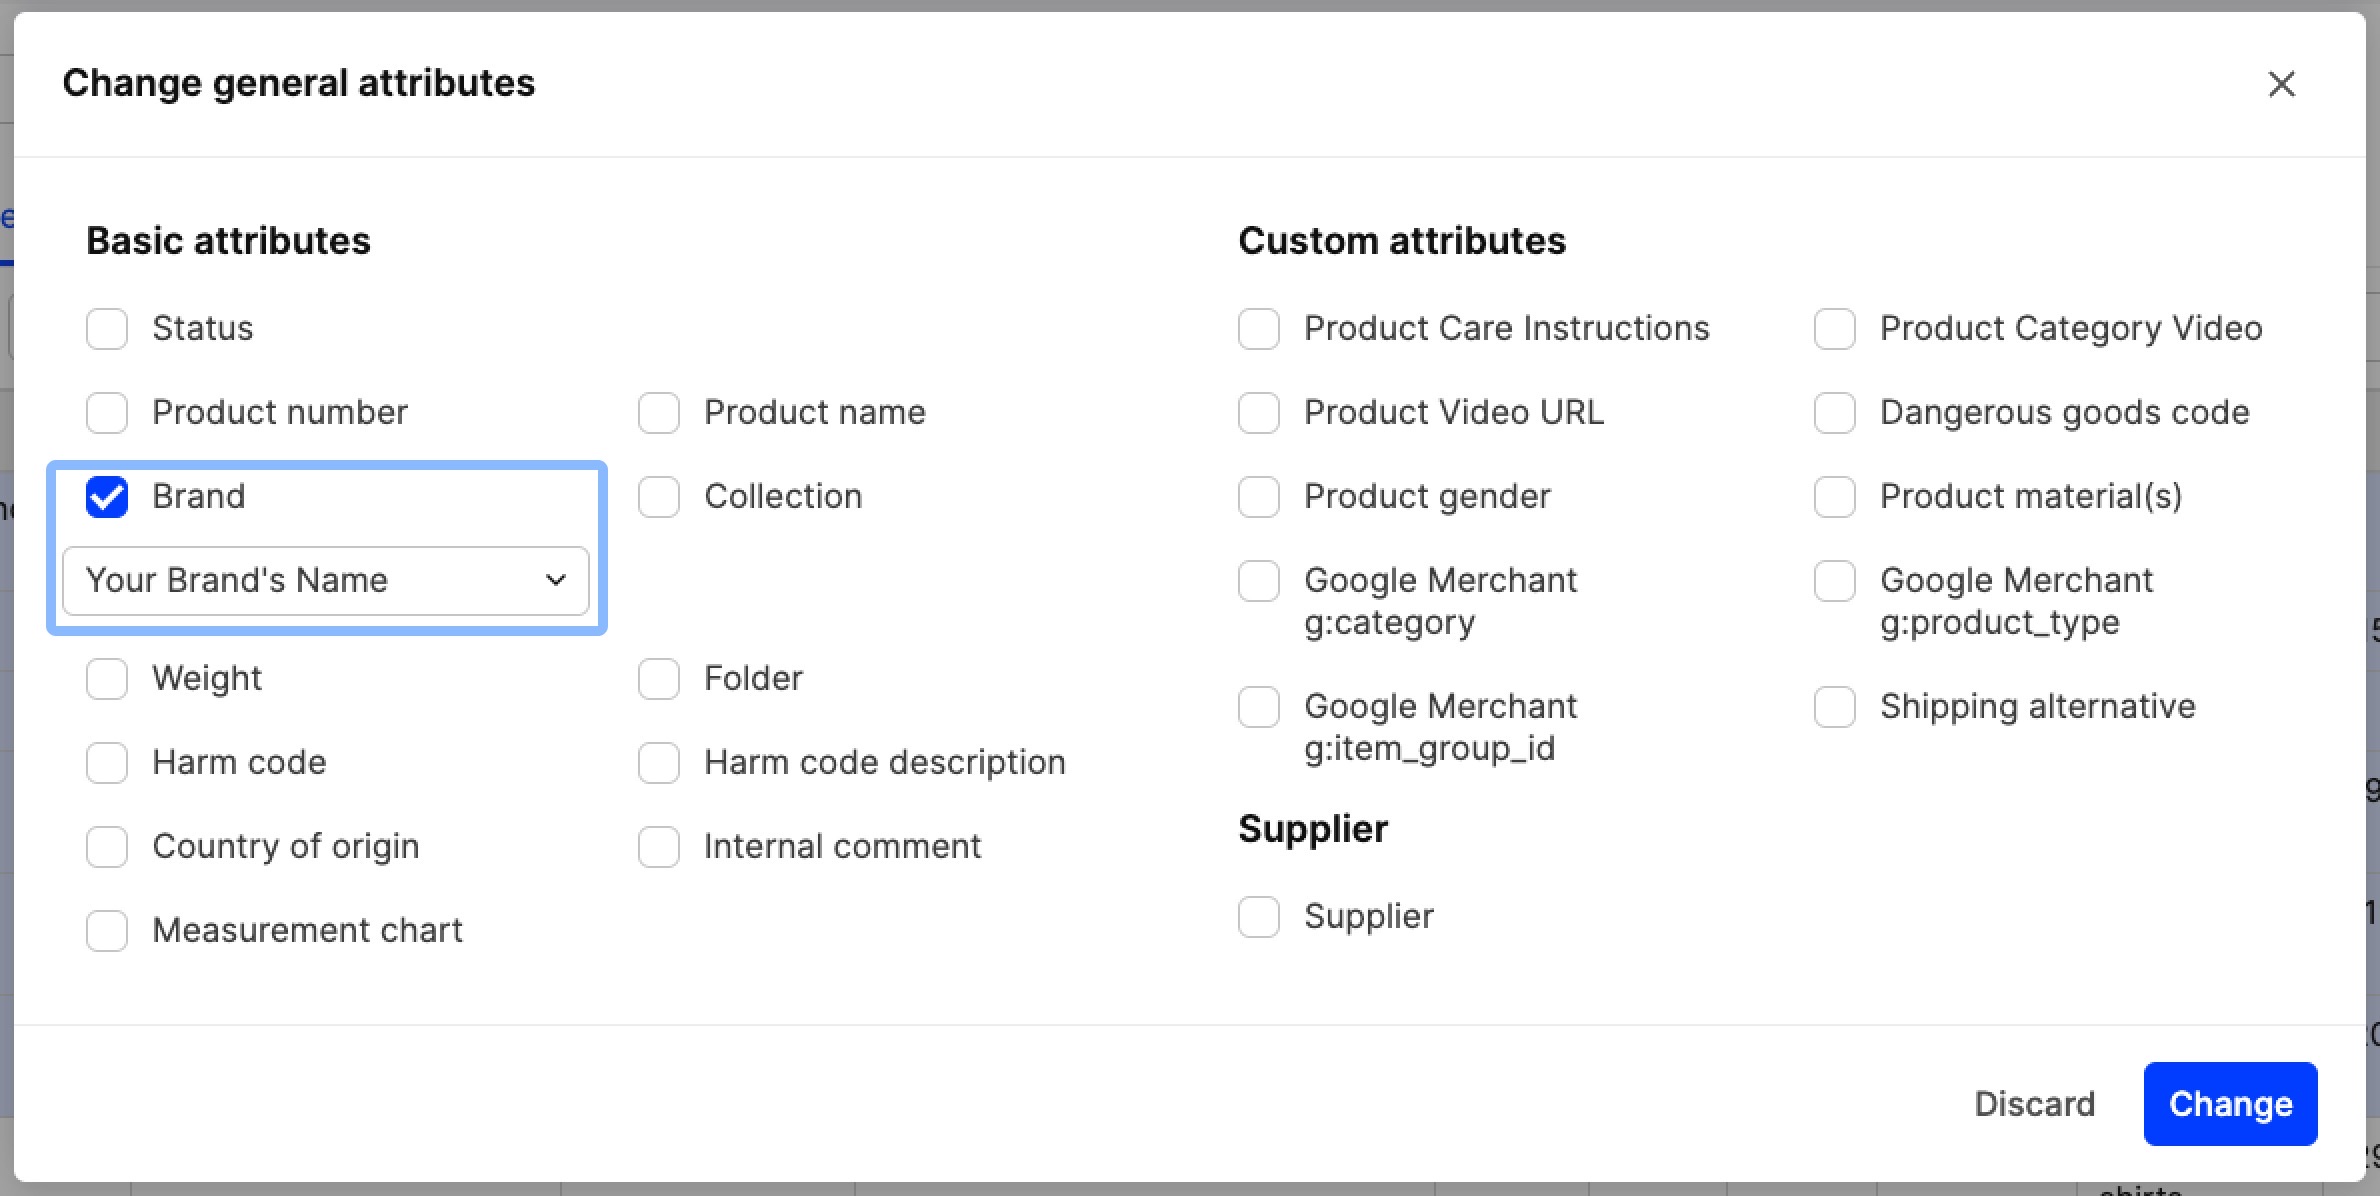
- Click 'Change' to perform the change on all selected products.
Product import
You can read about the Product import in more detail here.
-
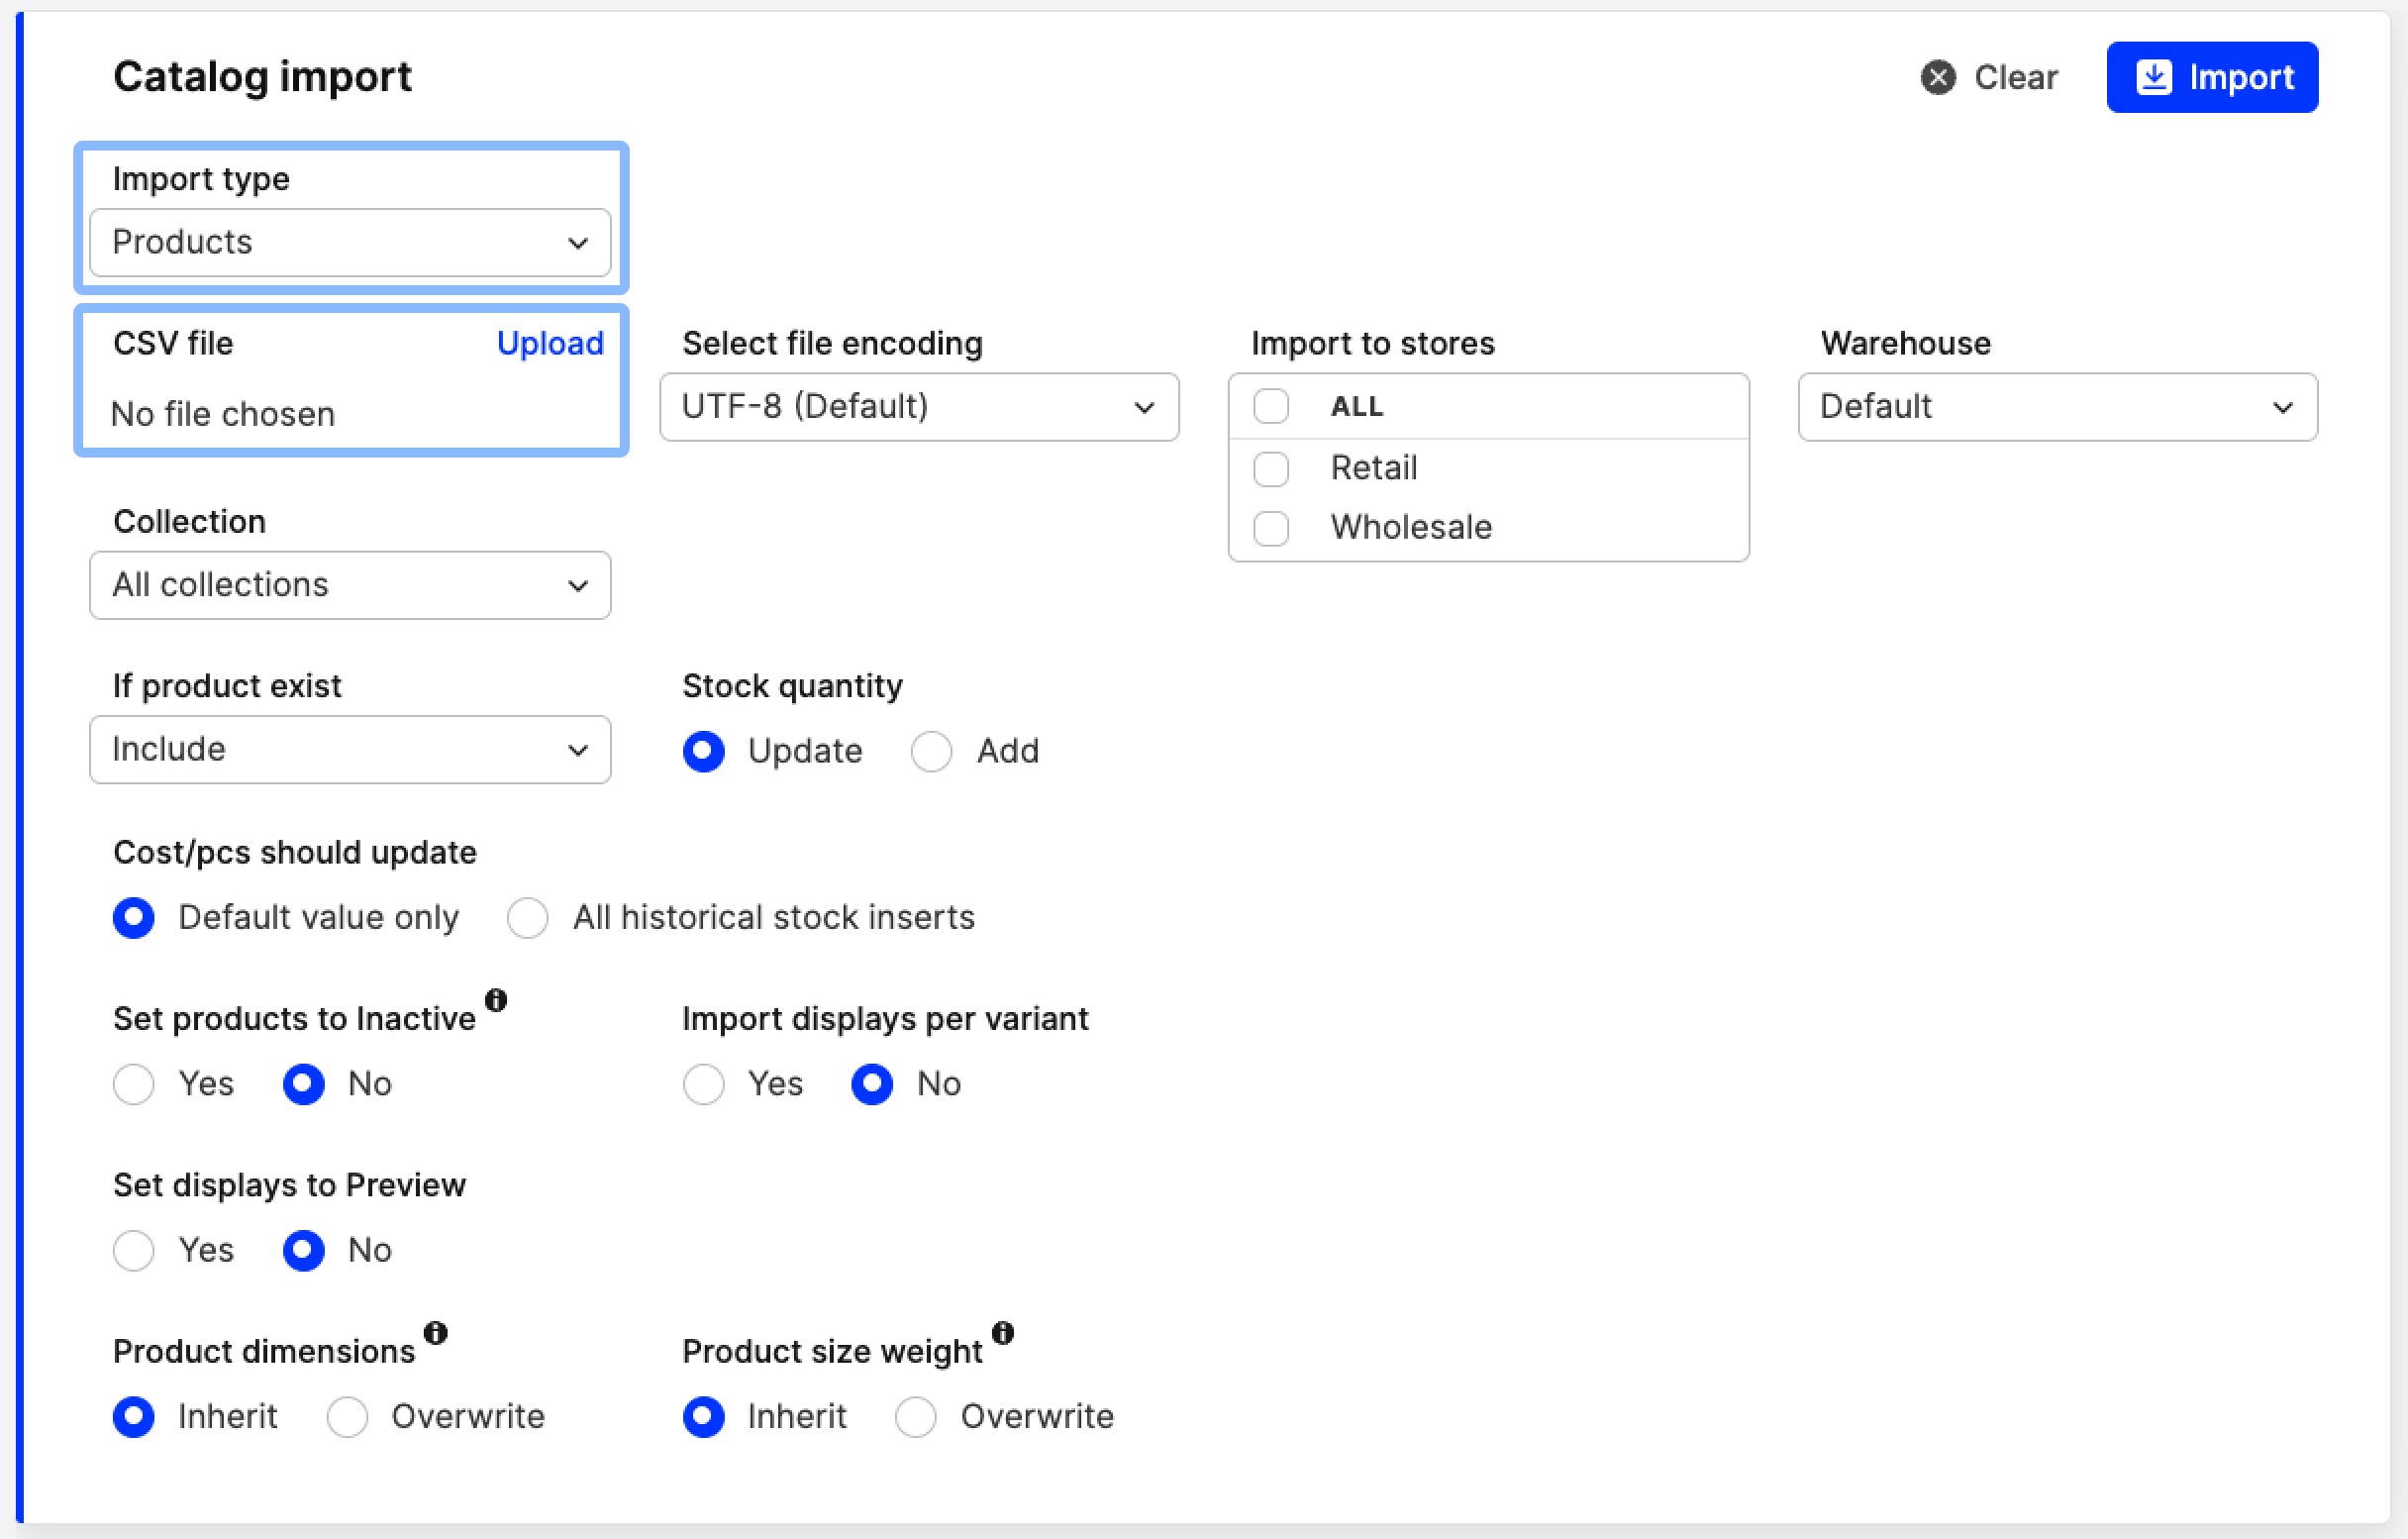
Navigate to the Import page by clicking on 'Products' and then 'Import'
-
Select 'Import type: Products' and upload your import file
-
To ensure no mistakes occur, the following data must be included so that Centra can recognise the exact Products you wish to update the Brand in: Product ID
If you have multiple variants within a Product, you can list the details of one variant if you only make changes to update the Brand. Read more about this here. -
Review the rest of the settings and use this article to find out which fields are required to update the Brand field
-
Click 'Import'
-
In the Crosscheck, check if the correct product has been identified by Centra and ensure all data is correct
-
Click 'Save'.